
 Combat training
OSRS Combat 1–99 Guide
Attack, Strength and Defence use the same training spots. What changes is your weapon, attack style and next equipment unlock. Hitpoints grows alongside the damage you deal. Start with a useful upgrade, then choose a spot that suits how much attention you can give it.
Updated
Train the stats that improve your next fight
Attack improves melee accuracy, Strength raises your maximum hit, and Defence helps you survive incoming attacks. You can train them on the same targets by changing attack style. Choose the stat deliberately, especially on a pure, and use a fast weapon that hits your target reliably.
Starting at level 1? See the quest route ↓Quest to 30 Attack and Strength
Optional quest route · order, requirements and next training method
Waterfall Quest is a big early jump for a main or a pure that wants both Attack and Strength. There is no skill requirement, but a fresh account can die in its dangerous areas. Get food and read the route before setting out.
Level 1 → 30 +13,750 Attack and Strength XP
Waterfall Quest
Before you start: A rope, six air runes, six water runes and six earth runes, plus food for the dangerous areas.
Start with Almera at the house above Baxtorian Falls. Complete the tomb and waterfall investigation for 13,750 XP in EACH of Attack and Strength.
Skip it if you are keeping Attack or Strength at 1. It gives no Defence XP, but its Attack reward still matters for a pure’s planned Attack cap.
Continue from level 30
With 30 Attack and Strength, equip an adamant scimitar and continue on a low-defence target such as sand crabs. Use the attack style for the stat you actually want to train; keep Defence XP off a 1 Defence build.
Go to the training instructions →Levels count the XP listed above from a fresh start. Making your own supplies, quest fights or optional lamps can put you further ahead.
Fight Arena, Tree Gnome Village and The Grand Tree add sizeable Attack rewards while unlocking useful transport and quest progress. Death Plateau and Vampyre Slayer also help. These are Attack-training quests. A Defence-only account should use a defensive attack style on weak monsters instead; completing these quests would raise Attack.
Without quests, begin with a fast weapon on weak monsters near a bank. Check the XP label in the combat-style panel before settling in. Accurate normally trains Attack, aggressive trains Strength and defensive trains Defence; the names and positions vary with the weapon. A controlled style splits the damage XP between all three.
After an immediate weapon unlock, bring Strength up to improve your maximum hit. Train Defence when the next armour upgrade or reduced incoming damage will help your actual method. If you are keeping Defence at 1, leave it there and choose equipment your build can wear.
Fastest Combat training
Attack, Strength and Defence share training locations, but your attack style decides which stat receives the XP. Train weapon requirements and Strength together instead of treating each stat as an unrelated grind.
Opening levels: combat quest rewards. Waterfall Quest can take both Attack and Strength from 1 to 30. Other quests add substantial Attack XP and travel unlocks. Bring the supplies for the fights and dangerous areas; the reward is not a reason to risk an unprepared Hardcore. Combat quest rewards.
Levels 1–15: Weak monsters near a bank
A short opening when you are not taking quest XP. Keep the time between targets low and choose the attack style which trains the intended skill.
Getting there
The chicken pens north-east of Lumbridge are easy to reach from Tutorial Island. Cows and goblins nearby are alternatives once you can defeat them comfortably.
Bring and unlock
Your best usable fast melee weapon and a little food. A scimitar is an easy default, but a quest-reward or special-purpose weapon may be better.
- Check the XP label on the attack-style button before attacking. Different weapon types place their training styles in different positions.
- Attack a fresh target as soon as the previous one dies. Move to a target with more Hitpoints when you spend more time clicking new monsters than fighting.
- Bank or heal before food becomes an emergency. Keep this stage short if useful combat quests are available.
The quantity shown uses chickens as the example. Choosing cows or goblins changes kills needed, even though the basic XP per damage remains the same.
Train your chosen melee stat to about 15 on low-defence targets, then try flesh crawlers or crabs. These brackets describe comfortable training stops, not monster unlocks. Raise Attack for better weapons and Strength for harder hits as you go.
Levels 15–40: Flesh crawlers in the Stronghold
A repeatable free-to-play option once the first levels are done. Automatic aggression reduces the effort spent selecting targets.
Getting there
Enter the Stronghold of Security beneath Barbarian Village and descend to the second floor. Use nearby banks at Edgeville or Varrock for supplies.
Bring and unlock
A fast melee weapon, your available armour and food. Know the exit route before staying for a full inventory.
- Choose a room with several flesh crawlers close enough to keep attacking you. Enable auto-retaliate.
- Eat as needed, and reset their aggression by travelling far enough away and returning when they stop attacking.
- Bank before supplies run out. If another player occupies the spot, use another room or world rather than sharing too few spawns.
The calculator uses a 25-HP flesh crawler. Other versions and nearby monsters should be compared with their own Hitpoints.
Flesh crawlers suit roughly 15–40 in your melee stats, especially on F2P. Bring food while your Defence is low. Members can move to crabs sooner for less incoming damage; F2P players can stay if the kills remain comfortable.

48 Slayer · 55 Attack · 43 Prayer · 38 Herblore · Neypotzli
From 55 Attack: Sulphur Naguas
A strong semi-AFK melee method because successful hits gain extra damage against the Naguas’ negative armour. Fast multi-hit weapons make especially good use of it.
Getting there
Progress Perilous Moons until you can enter Neypotzli beneath Cam Torum. Use the dungeon’s supply areas to prepare before moving to the Sulphur Naguas.
Bring and unlock
43 Prayer for Protect from Melee, a suitable weapon and moonlight potions made inside the dungeon at 38 Herblore. At 45 Herblore they give a super Attack boost; at 55 they also give a super Strength boost. Prayer gear buys longer breaks, while full blood moon and Piety trade more frequent potion sips for faster XP. Sulphur blades or glacial temotli work from 55 Attack; dual macuahuitl need 70 Attack and 75 Strength.
- Collect Herblore supplies from a dungeon crate. Gather moonlight grubs, crush them into paste, then combine the paste with vials of water. Turn on Protect from Melee and auto-retaliate before fighting. Sip a moonlight potion before Prayer runs low; the same sip refreshes your combat boosts.
- Use a fast or dual-hit weapon. Each successful hitsplat benefits from the negative armour, which is why a large slow single hit is not automatically better.
- Stand between several spawn marks, shown by sun symbols on the floor. Their raised-weapon special drains 5 Prayer if you stay beside them; stepping away avoids it, while a quieter session accepts that drain and needs earlier potion sips. Restock before your protection drops.
They are spectral, not undead, so a salve amulet does not apply. An ectoplasmator can give some Prayer XP, and sulphur essence can become Runecraft XP.
Once you have 55 Attack for sulphur blades and the Slayer, Prayer and Neypotzli requirements below, Naguas can train your melee stats to 99. Strength and Defence do not need to match 55; keep the weapon requirement separate from the stat you are training.
Protection prayers · reliable combat setup
Levels 50–99: Scurrius
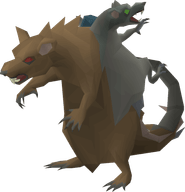
A useful bridge into bossing which also trains combat well. The value comes from learning prayer changes and movement while working towards a rat bone weapon.
Getting there
Enter the Varrock Sewers through the manhole east of the palace and follow the route to Scurrius’ enclosure. Choose the solo instance while learning.
Bring and unlock
Protection prayers, food, Prayer restoration and a teleport. Take a suitable weapon; after a spine drop, make a bone mace for melee or the corresponding ranged/magic weapon.
- Protect from Melee while next to Scurrius, then respond to the ranged and magic attacks. Move off falling-rock shadows.
- Keep attacking during the food phases and watch the phase change rather than relying on one protection prayer for the entire fight.
- With a rat bone weapon, clear summoned giant rats quickly: the weapon removes its attack delay against those minions.
- Bank or resupply between kills as needed. Use the complete encounter for your XP/hr measurement, including minions and waiting.
The group version has more health and a different XP bonus from the solo version. A boss-kill count based only on the solo boss’s HP would miss rat XP and other encounter differences, so this stage uses your full-session rate.
Around 50 in your melee stats is a reasonable point to learn Scurrius with protection prayers and food. Stay for the rat bone weapon and further combat XP if you enjoy the fight; crabs remain easier when you want to look away.
75 Attack · Hallowfell · Monkey Madness II tunnels
From 75 Attack: Hallowfell at maniacal monkeys
A late-game melee option which rewards keeping multiple targets in the weapon’s cleave area. Hallowfell can strike two additional enemies beside the main target.
Getting there
Reach Kruk’s Dungeon during Monkey Madness II, then use the maniacal monkey training tunnels on Ape Atoll.
Bring and unlock
Hallowfell, 43 Prayer, melee damage gear, food and a way out. Use Piety if unlocked. Prayer-potion drops can help sustain a longer session.
- Gather monkeys into a compact stack while protecting from melee. Choose a target which places other monkeys inside the cleave tiles.
- Keep the stack in front of and beside you as targets die. A cleave hits other unique enemies, not the same large enemy several times.
- Use suitable multi-target halberd specials if part of your setup, then return to Hallowfell. Re-form the stack when too many targets spread out.
The secondary hits are capped at half the weapon’s maximum hit. Count the damage across all targets in your DPS input; simply owning Hallowfell does not double every session’s XP.
With 75 Attack for Hallowfell and Monkey Madness II access, use cleave attacks on stacked monkeys to train your chosen melee stat. The Attack requirement unlocks the weapon; it is not a minimum Strength or Defence level.
Low-attention Combat training
The Gemstone Crab and Sulphur Naguas are the main choices for long sessions. Decide whether you want the fewest interactions or the stronger dual-hit setup.
Sulphur Naguas inside the Moons area. Use Protect from Melee and the area’s moonlight potions, then return before Prayer runs out. Their dual-hit interaction makes weapons such as sulphur blades useful. You still need to manage potion doses and aggression. See sulphur naguas inside the moons area.
Levels 10–30: Sand crabs
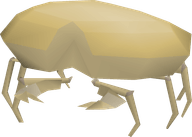
An easy members’ training stop with low incoming damage. Choose enough spawns to keep fighting, rather than automatically taking the busiest three-crab spot.
Getting there
Travel to Hosidius and head to its southern beach. From a Kourend arrival point, run south through Hosidius; a Xeric’s talisman or house teleport can shorten later trips.
Bring and unlock
A fast weapon, combat potions if worthwhile and some food until you know the spot’s damage. Set auto-retaliate on.
- Stand where two or three crabs can wake up and attack. Let the low-defence targets sustain the session.
- When aggression ends after roughly ten minutes, run far enough away to reset it, then return to the same tile.
- If you repeatedly wait for respawns, use more spawns or a higher-HP target. If you take too much damage, start with fewer crabs.
An empty two-crab spot can be better than competing over three spawns. Include aggression resets and potion upkeep in your measured pace.
Use sand crabs from roughly 10 to 30 in your melee stats, then consider ammonite crabs or the Gemstone Crab. You do not have to switch at 30; stay until longer-lived targets or a better training area would improve the session.
Levels 30–99: Ammonite crabs
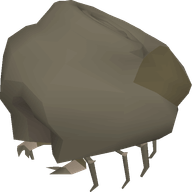
More Hitpoints per crab means fewer retargets and less wasted overkill as your weapon improves.
Getting there
Complete Bone Voyage and travel to Fossil Island. Use the barge from the Digsite for the first trip, then your unlocked digsite-pendant and mushroom transport routes.
Bring and unlock
The same core crab gear, food and combat boosts. Pick a coastal spawn cluster you can keep active without competing for every respawn.
- Stand within reach of the desired spawns and let auto-retaliate keep combat going.
- Reset aggression when the crabs stop waking up. Keep enough food for the return to the spot.
- Collect fossils when doing so fits the session; they can help with Museum displays or other account goals.
Bone Voyage unlocks the location, but it does not guarantee an empty training spot. Use sand crabs or the Gemstone Crab if the available spawns are worse.
Ammonite crabs suit a relaxed route from roughly 30 in your melee stats to 99. Upgrade weapons as Attack rises, and move to Naguas or Nightmare Zone when their access and setup are ready if you want to compare another low-attention method.
Levels 30–99: Gemstone Crab
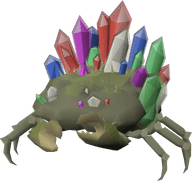
An effectively continuous target which removes respawn waits and overkill. It awards 87.5% of ordinary combat XP per damage, so compare the actual session rate instead of assuming every crab is identical.
Getting there
After Children of the Sun, travel to the Tlati Rainforest in Varlamore and find the Gemstone Crab. Use the nearby route through the caves when it moves.
Bring and unlock
Your training weapon and normal damage boosts. Stand at a safe side of the crab to avoid its attacks.
- Choose the intended attack style and start attacking from a safe tile.
- When the crab burrows after about ten minutes, follow the nearby cave route to its next location and attack again.
- Keep boosts active if you included them in your time budget. Mining the exposed crab for gems is optional and interrupts combat training.
There is no useful “crabs to kill” count here. The planner shows damage needed, with the reduced XP multiplier applied.
From roughly 30 in your melee stats, the Gemstone Crab offers a continuous target to 99. Its reduced XP per damage is the trade-off for almost no retargeting. This is an alternative to other crabs, not a compulsory next step.
Five suitable quest bosses · sustainable dream setup
Levels 60–99: Nightmare Zone
A controlled arena for a repeatable gear and monster setup. Decide whether this session is for low attention, fast XP or reward points before selecting bosses.
Getting there
Go to Dominic Onion’s enclosure north-east of Yanille. The minigame teleport is convenient when available.
Bring and unlock
At least five eligible quest bosses. Bring your chosen weapon and gear, and use Prayer potions for an initial points run if you have not unlocked enough absorption and overload supplies.
- Choose a customisable Rumble and a suitable set of simple melee bosses. Avoid adding awkward special mechanics just to increase the boss count.
- For absorption training, build up absorption points and lower current Hitpoints with a locator orb or rock cake once you understand the setup. Lower hits consume fewer absorption points.
- Refresh overloads or your chosen combat potions and keep Hitpoints at the intended level. Recalculate your session rate if you change the boss list or switch to a quieter setup.
Normal-mode absorption sessions and high-effort Dharok sessions are different methods. Dharok needs the full set and high maximum Hitpoints to justify its low-health effect; it is not automatically the best choice at 70 combat stats.
Count the XP for the stat you are training, including potion upkeep and time between dreams. Entry fees cost coins; absorption and overload potions use reward points.
Consider Nightmare Zone around 60 in your melee stats, once you have suitable quest bosses and a sustainable setup. It can carry the remaining grind to 99. Start with a short dream to check damage and potion use before buying supplies for many hours.
Other worthwhile methods
Use combat training to earn supplies, boss experience or Slayer levels when those matter more than maximum damage against one target.
Slayer and restricted accounts. Slayer adds task travel and monster variety to the combat grind. For a pure or other restricted account, check the weapon’s style and every quest reward before training. Controlled styles divide XP across melee stats. Account and supply choices.
Attack: unlock a weapon you can use
Attack 40 opens rune weapons. At 60, the dragon scimitar is a reliable affordable training weapon once Monkey Madness I is complete. At 70, an abyssal whip is a useful Attack and Defence weapon, but it cannot train Strength on its own. Weapon access and training style matter as much as the number on the skill guide.
Prioritise a fast weapon with an appropriate attack bonus and useful Strength bonus. Against a low-defence crab, an extra maximum hit can be worth more than a small accuracy increase. Against a boss with higher Defence, accuracy becomes more important.
Strength: improve damage between weapon unlocks
Melee damage increases in whole maximum hits. A small Strength level or equipment change may leave the displayed maximum hit unchanged until the next threshold. Potions, prayers, your attack style and Strength bonus all affect where that threshold falls.
A faster weapon can beat a slower weapon with a much larger maximum hit. Compare damage over time, including accuracy, instead of comparing only the biggest possible hit. Overkill also matters: a huge hit wastes damage on a monster with only a few Hitpoints left.
A rune scimitar covers the early free-to-play stretch. A dragon scimitar offers focused Strength XP after its quest unlock. Later options include a Saradomin sword, abyssal dagger, abyssal bludgeon and other purpose-built weapons, but their price and usefulness elsewhere should guide the purchase.
An abyssal whip trains Attack, Defence or all three melee skills together. If your target is Strength alone, switch weapons rather than accidentally spending hours on controlled XP.
Defence: make the setup sustainable
Defence improves your chance of avoiding an attack and unlocks armour. It does not directly increase melee damage. Train it when an armour upgrade or the incoming damage at your chosen spot makes it useful, rather than assuming it must always match Attack and Strength.
A protected Nagua session has different defensive needs from tanking several crabs. Check the full equipment requirements: a weapon may also require Strength, while the armour needed for a set effect can require Defence.
You can also earn Defence through defensive spellcasting or a ranged longrange style. Those styles share the XP and can change attack speed. Use the relevant Magic or Ranged setup before comparing their Defence rates with melee.
Hitpoints comes with the damage
A new character begins with 1,154 Hitpoints XP at level 10. Enter exact XP from your account instead of planning a fictional level-1 opening. Existing quest and combat XP is already included in that total.
Witch’s House awards 6,325 Hitpoints XP, taking a fresh account to level 24. Bring food and a suitable approach to the quest fights. Other quests add Hitpoints while unlocking useful areas; check all their rewards if you are preserving combat levels.
Eligible melee, ranged and magical damage normally gives Hitpoints XP. The damage from all targets of a multi-target attack counts, which is why a well-built stack can train Hitpoints much faster than attacking one monster at a time.
The dwarf multicannon gives Ranged XP without Hitpoints XP. Splashing gives only a spell’s base Magic XP because no damage is dealt. Alchemy, enchanting and other non-combat Magic spells also give no damage-based Hitpoints XP.
Poison and venom damage do not award ordinary combat XP for each damage tick. Do not include them in a damage budget intended to calculate Hitpoints training. Shared damage, healing monsters and special XP multipliers can also change a simple kill count.
Ordinary focused melee gives 4 XP to the chosen melee stat and about 1.33 Hitpoints XP per damage. The same supplies and training time earn both. Do not add a separate Hitpoints grind or charge for those supplies twice when planning the account.
Where Ranged and Magic fit
Ranged is combat training too, but ammunition, Ava’s devices, cannoning and chinchompa stacks need their own setup advice. The Ranged guide covers those methods and their costs. Cannon damage earns Ranged XP without Hitpoints XP, so it is a different account-planning choice from a bow or chinchompas.
Magic includes damage training and a large set of non-combat methods. Bursting a Slayer task can train several skills together; enchanting, alchemy and utility spells solve a different training problem. Choose the method for the unlocks and combined progress you want.
Time and cost for your goal
Combat time changes with your weapon, accuracy, boosts and target. The planner follows the chosen melee stat and shows secondary XP where relevant. A combined Attack, Strength and Defence rate should never be read as the rate for each stat separately.
Plan your Combat route or compare method quantities and costs.
Keep boosts working through the session
A super strength potion can add useful maximum hits throughout a session. Refresh it at a sensible interval and include the potions in your supply budget. Prayer boosts cost Prayer points, so a stronger prayer can be worthwhile for an active session but expensive to sustain at ordinary crabs.
Nightmare Zone overloads and Neypotzli moonlight potions change the cost of maintaining boosts. Their availability is part of what makes those locations useful. Set up the activity correctly before copying a rate achieved with permanent boosts.
Dharok’s equipment is a specialist Nightmare Zone option. Its damage effect needs the full set and low current Hitpoints, and benefits from high maximum Hitpoints. A player who has just reached 70 combat stats should not expect the same result as a high-Hitpoints Dharok setup.
Equipment and supplies on an Iron
On an Iron, a dragon scimitar is a dependable progression target because its source is fixed. A whip is a later Slayer goal or a combat drop, not simply a GE purchase at 70 Attack. Use the best practical weapon you own while progressing the unlock that comes next.
Scurrius gives a useful rat bone weapon after earning a spine, and Perilous Moons offers another route towards useful melee equipment. Include the time spent obtaining the weapon when deciding whether a training detour is worthwhile.
Slayer spreads some of the combat XP across less convenient targets, but also advances the account and supplies useful drops. Dedicated Strength training makes sense when a few levels or an equipment requirement will make those tasks easier.
If maintaining food and potions is taking longer than the training itself, try a lower-damage spot or a method with supplies inside the activity. The fastest rate while attacking is not always the quickest route from your bank to the finished level.
Read the setup before comparing XP per hour
A high-efficiency combat rate belongs to a particular weapon, stats, boosts and target. The planner shows a published reference when your selected setup fits it, alongside a more conservative planning allowance. A maxed player’s hour with Piety is not a level-60 rate.
For a different setup, the damage-rate controls let you budget the route without pretending to simulate equipment. Include misses, aggression resets, banking and potion upkeep in that average. A 15–30 minute session can refine it once you reach the spot.
Published high-efficiency rates are useful targets, but they are not mathematical ceilings. Combat damage rolls and the targets available change the result. Action-speed limits, such as the maximum number of attacks in an hour, describe a different limit.
Clicks and client settings
Know when an aggression reset is needed
These RuneLite plugins are included with the client. Find them in the plugin configuration sidebar, turn them on and open their settings.
NPC Aggression Timer: a reminder for ordinary crab spots
Enable NPC Aggression Timer and Show timer in RuneLite. Show area lines marks the tracked aggression area. If the plugin asks you to initialise it, follow its infobox instructions after travelling into the area. When ordinary crabs stop attacking, move outside the tracked area and return. If filtering by NPC names, use the rock-form name, such as fossil rock for ammonite crabs.
Use this for ordinary crab training. Follow the method’s own instructions for other encounters.
Choose your next goal
Open the Combat Training Planner for your method switches and time budget, or compare one method’s quantities in the Combat Calculator.