
 Agility training
OSRS Agility 1–99 Guide
Train from your first Draynor lap to 99, with options for faster XP, marks of grace and less demanding courses. The guide covers when to switch, how to get there and which quests can skip the early levels.
Updated
Faster travel, marks of grace or maximum XP?
Agility improves run-energy recovery and opens shortcuts around the map. Most training means completing full laps, but the right course depends on whether you want marks of grace, faster levels or fewer awkward clicks. Wear light equipment and bring a little food while falls are still common.
Starting at level 1? See the quest route ↓Quest from 1 to 33 Agility
Optional quest route · order, requirements and next training method
If you are building a new member account, these four quests skip the first rooftop courses. Start at 1 Agility, but get the other skill and quest requirements below first. You can stop after any reward and start running laps at your new level.
Level 1 → 26 +9,300 Agility XP
The Tourist Trap
Before you start: 10 Fletching and 20 Smithing; supplies for the desert and a fight with a level-47 mercenary captain.
Speak to Irena just south of Shantay Pass. Rescue Ana, then choose Agility for BOTH of the 4,650-XP rewards. This first quest alone takes you to 26.
Level 26 → 27 +1,000 Agility XP
Recruitment Drive
Before you start: Black Knights’ Fortress and Druidic Ritual completed. Black Knights’ Fortress needs 12 quest points.
Start with Sir Amik Varze in the White Knights’ Castle in Falador, then complete the Temple Knights’ tests.
Also gives 1,000 Prayer XP. Skip this step if you are keeping Prayer at 1.
Level 27 → 28 +1,500 Agility XP
The Depths of Despair
Before you start: 18 Agility, already reached above, and Client of Kourend completed.
Speak to Lord Hosidius in his house in Hosidius. Follow the search for his son and bring combat supplies for the Sand Snake.
Level 28 → 33 +7,900 Agility XP
The Grand Tree
Before you start: 25 Agility, already reached above; prepare for the level-172 Black demon.
Speak to King Narnode Shareen inside the Grand Tree. Bring a ranged or magic attack for the demon’s safespot; the quest also opens gnome glider travel.
Also gives 18,400 Attack XP and 2,150 Magic XP. Skip it if those rewards would exceed your account’s stat limits.
Continue from level 33
At level 33, run Varrock rooftops to 40 for marks of grace. For faster, more repetitive XP, use the Brimhaven floor spikes instead; at 40, the full arena circuit becomes available.
Go to the training instructions →Without these quests, walk west from Lumbridge and start Draynor rooftops at level 1. If you only do The Tourist Trap, use Al Kharid rooftops from 26 to 30, then Varrock. Skipping other steps changes the final level; the levels shown here assume all four rewards.
Levels count the XP listed above from a fresh start. Making your own supplies, quest fights or optional lamps can put you further ahead.
Fastest Agility training
Start with quest XP or Draynor rooftops, move to Brimhaven at 20, then learn Hallowed Sepulchre from 62 after Sins of the Father. The second floor makes Sepulchre a better training choice than its first floor alone.

Levels 1–20: Draynor rooftops
Climb across Draynor’s rooftops in a fixed circuit, finishing each lap for the completion XP. This is close to Lumbridge and gives marks of grace from your first levels, so you can start saving for Graceful straight away.
Getting there
From Lumbridge, walk west past the farm into Draynor Village. Start on the rough wall of the house northeast of the bank. A glory teleport is a quicker return once you have one.
Bring and unlock
Wear light equipment, bring a little food for falls, and restore run energy when needed. Marks of grace take inventory space.
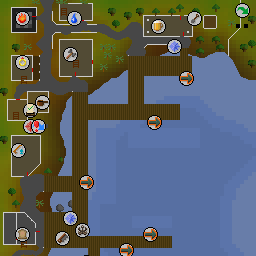
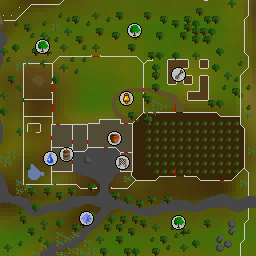
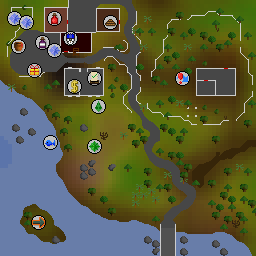
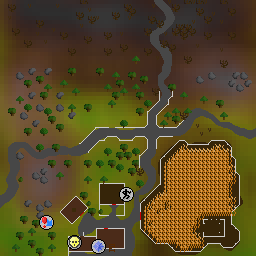
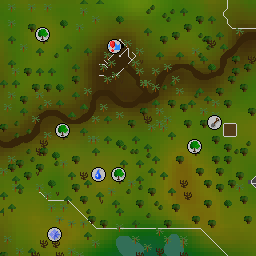
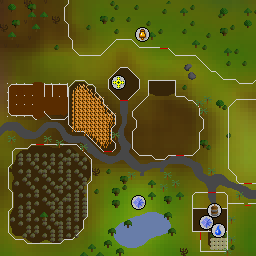
The first climb is northeast of the bank. From Lumbridge, walk west into the village and follow the road north past the market.
- Start at the course’s climbable wall and follow the obstacles in order. Finishing the final obstacle awards the lap bonus.
- Pick up marks as you pass them. If you fall, return to the course entrance and complete a new full lap.
- Before moving on, compare the next course’s travel, failures and diary bonus with the reward you still need.
Graceful costs 260 marks. Buying the whole set is a useful goal, but do not keep doing a slower course after you have the marks you wanted.
Normal rooftop laps; failures and missed clicks lower your pace.
Run complete laps from 1 to 20 and collect marks of grace as they appear. At 20, switch to Brimhaven floor spikes for faster XP, or Al Kharid rooftops if you want to keep collecting marks.
Levels 20–40: Brimhaven floor spikes
Cross the same floor-spike obstacle back and forth inside Brimhaven’s arena. Each successful crossing gives 24 XP, and staying on that obstacle avoids the slow trips between ticket dispensers while the harder obstacles are still locked.
Getting there
Take the ship from East Ardougne to Brimhaven, then pay Cap’n Izzy No-Beard 200 coins to enter the arena.
Bring and unlock
Bring food and coins. Floor-spike failures deal damage until level 50. The arena’s dart traps can also drain Agility, so bring a restore or boost if you plan to cross those.
- Find a floor-spike obstacle and cross back and forth. You need 20 Agility for it.
- Tag a nearby active pillar when it is worth the detour. At 40 you can pass all obstacles and chase every pillar.
Keep the camera steady so the next click is easy to place. Regular clicks are still required; low movement is not automatic training.
Planning at 27k XP/hr; the repeated-spike setup reaches about 30k at low levels and up to 36k from 50, when failures stop.
Repeat the spikes until 40, then start following the arena’s highlighted pillars. A summer pie lets you start the spikes from 15 if you keep the boost active.
Levels 40–62: Brimhaven arena circuit
At 40 Agility, every obstacle in the arena is available. Cross the arena to tag the highlighted ticket dispenser, then use the spare time on floor spikes for more XP. You choose the route each time, so this is more active than following a fixed rooftop lap.
Getting there
Take the ship from East Ardougne to Brimhaven, then walk east to Cap’n Izzy No-Beard and pay 200 coins to enter. Climb down the ladder. A glory teleport to Karamja followed by a walk west is another option; a planted Brimhaven spirit tree is convenient later.
Bring and unlock
Bring the travel fare, 200 coins for entry, food and run restoration. Dart-trap failures drain Agility, so an Agility potion or summer pie keeps all the obstacles available. Karamja gloves 2 or better give 10% more obstacle and redeemed-ticket XP; wear them when handing tickets in as well.
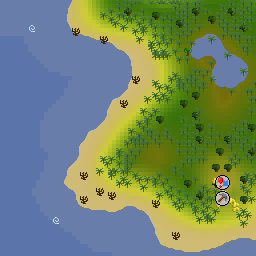
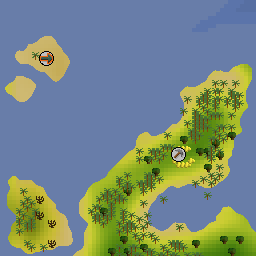
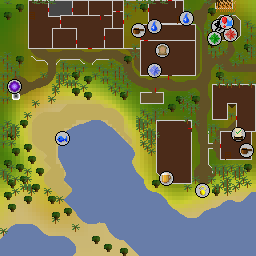
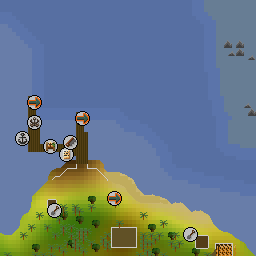
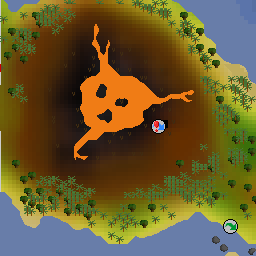
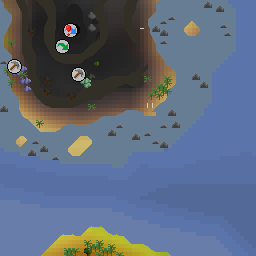
The ship arrives at the docks northwest of the marked entrance. The arena itself is underground.
- Follow the yellow arrow to the active ticket dispenser and click it to tag it. The active dispenser changes roughly once a minute. A successful tag gives immediate XP, an Agility arena ticket and a Brimhaven voucher.
- After tagging, cross a nearby floor-spike obstacle back and forth until the arrow changes. Leave in time to reach the next dispenser: standing at a tagged pillar until the next one appears gives up the obstacle XP included in this training rate.
- Watch your Agility level after failing darts. Restore it if it drops below 40, then continue to the next dispenser. Keep eating and restoring run energy before either interrupts the route.
- Climb back upstairs and trade the Agility arena tickets with Pirate Jackie the Fruit when you finish. Each ticket gives 345 XP, or 379.5 with Karamja gloves 2 or better. Brimhaven vouchers are the separate currency for shop rewards.
 Tickets become XP
Trade these with Pirate Jackie the Fruit after training. Wear Karamja gloves 2 or better for the extra redemption XP.
 Vouchers buy rewards
Spend these on the arena’s shop items. Spending a voucher does not use up one of your XP tickets.
Learn the obstacle layout before chasing maximum rates. Taking the long way around a gap repeatedly can erase the advantage over rooftops.
Pillar tagging with obstacles between activations, without Karamja gloves. Ticket redemption contributes to the reference pace.
Train here to 62, then learn Hallowed Sepulchre after completing Sins of the Father. Without the quest, you can keep using Brimhaven or choose rooftops. The Wilderness course is a faster alternative from 52 if you accept the risk.
Levels 52–62: Wilderness Agility Course
A quick middle-level route when you accept player-killer risk. Keep the value you carry low.
Getting there
An Ice Plateau teleport tablet lands near the course in deep Wilderness. Alternatively travel from the Mage Arena bank area and slash the webs with a knife.
Bring and unlock
Food, run restoration and only items you can afford to lose. A summer pie lets you enter from 47. Keep at least 49 Agility for the pipe obstacle; from 52 you can complete the course without a boost.
- Complete the pipe, rope swing, stepping stones, log and rocks in order.
- If you fail the log, go back across the stepping stones and retry it so you keep the full-lap completion reward.
- Cash out tickets and bank supplies before a large carried stack makes the trip riskier than you intended.
The optional dispenser deposit is not required just to run the course. Decide separately whether the extra loot is worth risking that money.
About 50–60k XP/hr including tickets and ordinary falls; escapes and banking take extra time.
Switch to Hallowed Sepulchre at 62 after Sins of the Father. If it is not unlocked, you can continue here or return to Brimhaven or rooftops.
Levels 62–99: Hallowed Sepulchre
Run through a timed dungeon of moving swords, bolts, flames and teleport pads. Each floor adds new patterns to learn. At 62 you can finish the first two floors; later unlocks let each run go deeper. Consistent movement and knowing where to wait matter more than clicking quickly.
Getting there
Complete Sins of the Father, then enter from Darkmeyer’s northern side. Its quest chain includes Nature Spirit, which awards 2,000 Defence XP, so Sepulchre is unavailable to a 1 Defence pure. Drakan’s medallion is the convenient return teleport.
Bring and unlock
Bring food and run restoration while learning. Buy the Hallowed ring early if mistakes are frequent: it removes trap damage and shortens the recovery after a hit. A Saradomin item lets you use the obelisks between floors to restore run energy. Side coffins are optional; the later ones need up to 56 Construction, 54 Prayer and 62 Ranged, plus a saw, hammer, planks and matching nails for bridges; vampyre dust for braziers; a crossbow and mithril grapple for pillars; or runes for an enchantment spell. A lockpick speeds up the coffins themselves.
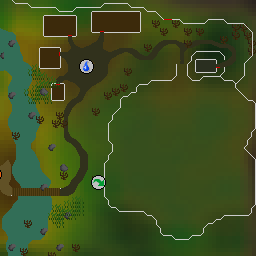
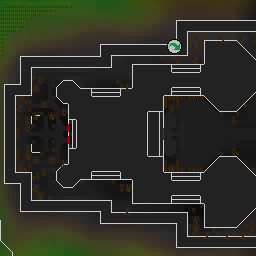
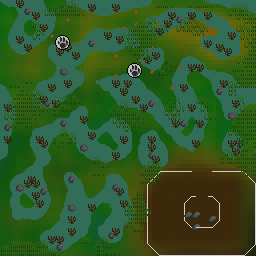
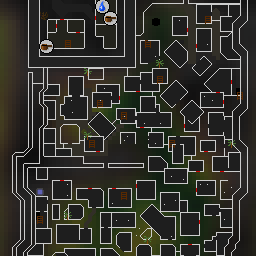
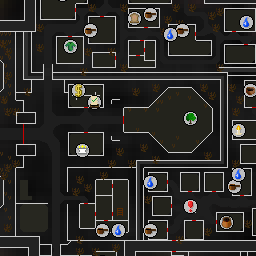
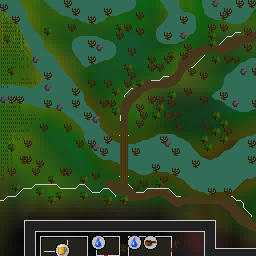
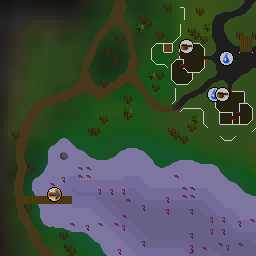
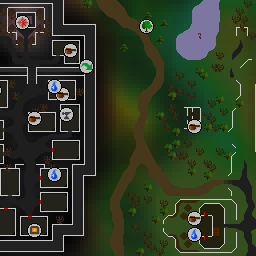
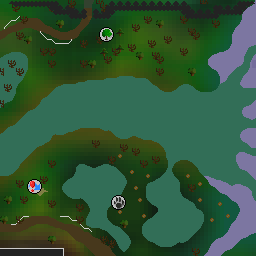
The entrance is on the northern side of Darkmeyer. Complete Sins of the Father for access; Drakan’s medallion brings you back to the city.
- Watch the approaching bolts or sword before leaving a safe tile. Run across the firing lane after the projectile passes, and wait outside a flame lane until the fire stops. Use your character’s true tile to judge where you are; the running animation trails behind it.
- Finish the deepest floor you can within the timer. Floor 4 opens at 77 and floor 5 at 87 following the 2026 changes.
- Learn consistent movement first, then add worthwhile coffins. At 87 Agility the Grand Coffin needs 84 Thieving; at 92 Agility it needs 66.
- Spend Hallowed marks on helpful activity equipment and the private instance when it suits you. The instance keeps a consistent starting trap rotation, which makes practice easier.
At floor five, looting worthwhile floor-four and floor-five side coffins brings the published practised pace down to about 85.8k XP/hr. Skipping even the Grand Coffin can reach 105–108k at maximum efficiency. Choose the loot you want before comparing rates, and count failed runs when measuring your own hour.
XP-focused runs, with only the Grand Coffin looted when eligible. Floor access: 52, 62, 72, 77 and 87. Learning runs and extra coffin looting are slower.
You can enter at 52, but this route switches at 62 when the second floor opens. Keep going to 99, learning the additional floors at 72, 77 and 87.
A practised floor-five Sepulchre run can exceed 100,000 XP per hour. Looting more coffins changes that comparison; keep the loot choice attached to the rate.
Low-attention Agility training
Agility still needs you to complete obstacles. Choose longer animations and a predictable route when you want to look away between clicks.
Levels 20–99: Rooftop courses
Keep completing full laps and collect marks as you pass them. The useful differences between courses are the starting point, failure rate and diary shortcuts.
Bring and unlock
Wear light equipment, bring a little food for falls, and restore run energy when needed. Marks of grace take inventory space.
- Start at the course’s climbable wall and follow the obstacles in order. Finishing the final obstacle awards the lap bonus.
- Pick up marks as you pass them. If you fall, return to the course entrance and complete a new full lap.
- Before moving on, compare the next course’s travel, failures and diary bonus with the reward you still need.
Levels 20–30: Al Kharid rooftops
Use this until Varrock if you want rooftop marks rather than Brimhaven XP.
Start here: Start on the rough wall north of Al Kharid bank. Walk through the Lumbridge gate or use a ring of dueling to the PvP Arena.
Levels 30–40: Varrock rooftops
A bridge to Canifis or Falador; long travel is not needed to train these levels.
Start here: Start at the rough wall southeast of Varrock’s central square, south of the east bank. Varrock Teleport is close.
Levels 40–50: Canifis rooftops
Popular for Graceful. Unlike other rooftops, Canifis keeps its normal mark chance when you are 20 levels above the requirement.
Start here: After Priest in Peril, walk east from the Paterdomus temple into Canifis. The first climb is the tall tree just north of the bank; a Kharyrll teleport is another option.
Move to Falador at 50 for XP. Staying at Canifis longer is useful when finishing Graceful matters more than levelling quickly.
Levels 50–60: Falador rooftops
A useful XP jump from Canifis. Falls are common near the requirement and stop at 66.
Start here: The first rough wall is south of Falador’s eastern bank. Falador Teleport gives a short walk to the start.
Levels 60–70: Seers’ Village rooftops
The diary changes the route substantially: teleport back to the bank after each lap instead of running back.
Start here: Climb the wall of Seers’ bank. Camelot Teleport is the basic route; Kandarin Hard lets you redirect it to the bank.
At 70, compare Pollnivneach with your Seers lap. Kandarin Hard can make staying at Seers worthwhile if you do not also have Desert Hard.
Levels 70–80: Pollnivneach rooftops
The Desert Hard diary improves this course. Compare that with your diary-assisted Seers pace before switching.
Start here: Take a carpet from Shantay Pass, then start at the basket in the south of Pollnivneach. Bring coins for the carpet.
Levels 80–90: Rellekka rooftops
Another course whose diary bonus makes the switch more attractive.
Start here: Start on the rough wall south of Rellekka’s market. An enchanted lyre is close; otherwise walk north from Seers’ Village.
Levels 90–99: Ardougne rooftops
A straightforward route through the final levels. Ardougne Elite increases marks, rather than the XP awarded by a lap.
Start here: Climb the wooden beams southwest of Ardougne’s south bank. Ardougne Teleport or a nearby spirit tree gets you close.
Graceful costs 260 marks. Buying the whole set is a useful goal, but do not keep doing a slower course after you have the marks you wanted.
Compare XP rates for these methods
Normal rooftop laps; failures and missed clicks lower your pace.
Levels 50–99: Colossal Wyrm course
Longer obstacle animations and no failures make this a comfortable alternative to rooftops.
Getting there
After Children of the Sun, travel to Varlamore and head to the Colossal Wyrm remains southeast of the Hunter Guild. The nearby quetzal landing is convenient once built.
Bring and unlock
Light equipment and space for termites. Speak to Worm Tongue when you first arrive; there is no Graceful requirement.
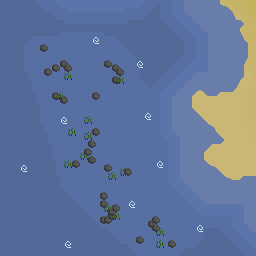
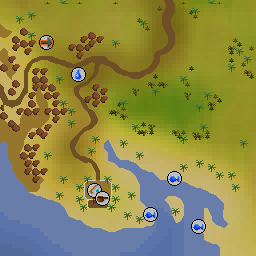
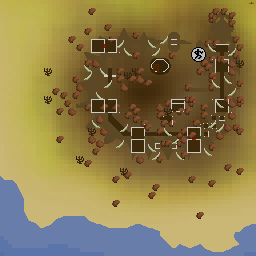
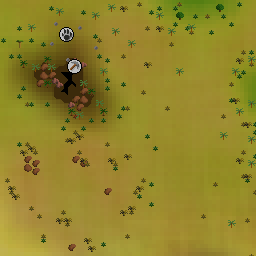
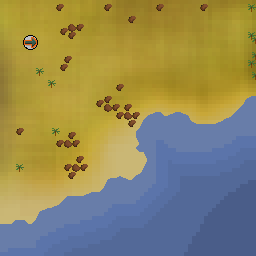
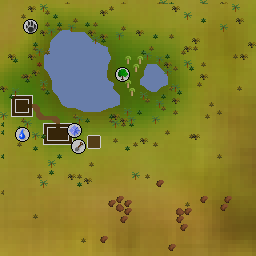
Look southeast of the Hunter Guild in Varlamore. Speak to Worm Tongue at the remains, then use the basic or advanced entrance for your level.
- Use the basic course from 50 and switch to the advanced course at 62. Follow the course’s climb and jump actions around the skeleton.
- Pick up termites and finish full laps. Spend termites on the rewards you actually want, including amylase packs.
Termites are not marks of grace. Amylase packs bought here can be sold to Grace for marks, but that conversion loses value compared with buying amylase directly for stamina supplies.
Basic course to 61, advanced from 62. Planning paces allow normal pauses; longer animations do not make the whole lap automatic.
Make the next click easier
Keep your camera angle consistent, put the next obstacle where you can see it, and use the Agility plugin to highlight obstacles, marks of grace and Prifddinas portals. Watch the actual hazards when timing a Sepulchre crossing.
Run energy, weight, falls and diary shortcuts all change actual lap time. If the next course feels slower at its unlock, stay briefly at the current one or use a boost, then compare full sessions. A diary-assisted course can beat a higher-level course without its diary.
Other worthwhile methods
Choose a reward before deciding whether a slower course is worth staying at.

Levels 1–20: Gnome Stronghold course
A short, safe opening when quest XP is not available. Draynor rooftops also work from level 1; choose the closer start.
Getting there
Walk northwest from East Ardougne through the Tree Gnome Stronghold gate. The course is southeast of the Grand Tree. A spirit tree is quicker once your account has access.
Bring and unlock
No special item is required. Wear light clothing so you can keep running.
- Cross the log at the south end. Climb the net and branch, cross the tightrope, then climb down.
- Climb the final net and crawl through a pipe. The completion bonus is the reason to do the whole circuit.
Do not repeatedly train one obstacle here: that gives up most of the lap XP.
About 8.5k XP/hr for ordinary full laps; clean laps can approach 10k.
Use this course to 20 if you are already near the Stronghold and want a course without falls. From Lumbridge, start at Draynor instead: it is much closer and gives marks of grace. At 20, switch to Brimhaven spikes for XP or Al Kharid rooftops for marks.
Crystal shards or monkey backpacks?
After Song of the Elves, the Prifddinas course opens at 75. Start beside the northwestern bank and use the portals that appear along the route: they skip obstacles and are part of its faster lap time. It offers about 60k XP/hr at 75 and 65k from 90 with good attention, plus crystal shards. It is a useful alternative when you want shards for crystal equipment or divine potions.
Ape Atoll opens at 48 with the Monkey Madness access and an appropriate monkey greegree. Expect about 30–35k XP/hr near the requirement; from 75 there are no falls and clean laps can reach 55k. After Monkey Madness II, the lap milestones unlock monkey backpacks, so the collection log can be a better reason to stay than raw XP.
Keep marks for the reward you still need
Full Graceful costs 260 marks. Marks can also buy amylase for stamina potions, which is why an Iron may stay on a reward route after the outfit is finished. Other rooftops reduce mark spawns when your unboosted level is 20 above their requirement; Canifis is the exception.
For mains, amylase is a saleable reward, but its value changes with the GE. Sepulchre profit is much less even because the ring of endurance is a rare drop. Do not budget for receiving one during a short grind.
Time and cost for your goal
Rooftops mainly cost run restoration and optional teleports. Sepulchre adds learning time before its higher rates become useful. Choose your quest access and diary shortcuts in the planner to compare the remaining hours.
Plan your Agility route or compare method quantities and costs.
Clicks and client settings
See the next obstacle clearly
These RuneLite plugins are included with the client. Find them in the plugin configuration sidebar, turn them on and open their settings.
Agility: clickboxes, marks and portals
In RuneLite’s plugin configuration, search for Agility and enable it. Turn on Show Clickboxes and Highlight Marks of Grace. The outlines make obstacles easier to find, while the mark highlight helps you notice a pickup before continuing. At Prifddinas, enable Highlight Portals and take the portals as they appear.
Ground Markers: learn Sepulchre safe tiles
Enable Ground Markers, then hold Shift and right-click a floor tile to mark it. While learning Sepulchre, mark safe waiting spots before traps and the tiles you use to line up a crossing. Watch the trap before moving: a marker remembers a position, but does not tell you when a projectile will pass. Ordinary rooftops usually only need the Agility plugin’s obstacle highlights.
At Sepulchre, watch the trap animations before moving. Start by learning one floor’s safe spots and timing.
Choose your next goal
Open the Agility Training Planner for your method switches and time budget, or compare one method’s quantities in the Agility Calculator.