
 Ranged training
OSRS Ranged 1–99 Guide
Use a fast weapon against a target you can hit, recover the ammunition worth saving, and choose a method that fits your budget. Chinchompas make fast multi-target training possible, while crabs and Slayer offer useful ways to spread the cost over a longer account goal.
Updated
Match the weapon to the target
Ranged training works best when attacks land often and you spend little time finding another target. Ordinary weapons give a simple start; a cannon or chinchompas can buy faster XP at a much higher supply cost. Rapid is the usual training style; Longrange also trains Defence.
Starting out
Rapid shortbow attacks are a straightforward opening from level 1. Upgrade the bow and ammunition as you unlock them. Darts are another fast option where accuracy is not a problem. A crossbow’s large individual hit does not automatically make it faster training.
The Dwarf Cannon quest unlocks a cannon without a Ranged-level requirement. It can train the early levels quickly, but consumes purchased or smithed cannonballs. Cannon damage gives 2 Ranged XP per damage and no Hitpoints XP.
Complete Animal Magnetism when its quest requirements fit your account. The attractor starts at 30 Ranged, the accumulator at 50, and the assembler is a later upgrade involving Vorkath. These devices reduce ammunition consumption; they do not rescue thrown chinchompas.
Fastest Ranged training
A cannon can speed up the opening. Chinchompas become the main fast route once you have suitable monkey-area access and the supplies to sustain it.
Levels 1–10: Weak monsters near a bank
A short opening when you are not taking quest XP. Keep the time between targets low and choose the attack style which trains the intended skill.
Getting there
The chicken pens north-east of Lumbridge are easy to reach from Tutorial Island. Cows and goblins nearby are alternatives once you can defeat them comfortably.
Bring and unlock
A fast ranged weapon, suitable ammunition and your best usable ranged equipment. Use rapid for bows and darts; set auto-retaliate on. Bring food until you know the incoming damage.
- Equip the bow and matching arrows, then choose rapid. Start on chickens or another weak target near Lumbridge.
- Move to the next target promptly. Upgrade the shortbow when its level requirement is met, and carry ammunition which it can fire.
- Move to a higher-HP target when retargeting wastes too much time.
The opening count uses chickens with 3 Hitpoints. A different target changes the kill count.
Train on low-defence targets until about 10, then move to sand crabs for less retargeting. Keep upgrading your bow and ammunition as they unlock; these are suggested training brackets, not requirements to attack the monsters.
Levels 1–99: Cannoning ogres
A useful early Ranged method when you can afford the cannonballs. Cannon XP is independent of the XP from the weapon you hold.
Getting there
The ogres east of Castle Wars are a common accessible spot. Use a ring of dueling to Castle Wars and run east to a suitable cluster.
Bring and unlock
Dwarf Cannon completed, all cannon pieces, cannonballs, food and a teleport. Your selected attack style and equipment affect the cannon’s accuracy, so wear a useful setup rather than treating every outfit as identical.
- Assemble the cannon where several ogres pass through its firing lines. Load cannonballs and watch its coverage.
- Keep it loaded, and move or tag targets to bring them into useful firing positions. Avoid blocking the cannon in a spot with too few targets.
- Record cannon-only XP and ammunition consumed over the whole session. Pick up the cannon before leaving; understand its retrieval rules if it decays.
A personal bow attack also awards Ranged and Hitpoints XP, but that damage is not included in this cannon-only calculation. Cannonballs can also be used productively during suitable Slayer tasks.
A cannon can add Ranged XP at any Ranged level after Dwarf Cannon. Use it alongside suitable combat or Slayer tasks rather than treating it as a required step between bow tiers. It consumes coins quickly and gives no Hitpoints XP for its damage.
Levels 45–99: Chinchompas at maniacal monkeys
Each throw can damage a cluster of monkeys. Red chinchompas require 55 Ranged, while grey chinchompas start at 45 and black chinchompas at 65. Use the colour your level and budget support.
Getting there
Reach chapter II of Monkey Madness II and enter the maniacal monkey training tunnels in Kruk’s Dungeon on Ape Atoll.
Bring and unlock
Chinchompas, 43 Prayer, suitable ranged gear and a teleport. Use medium fuse, the rapid style. Bring initial Prayer restoration and ranging potions; a light source and the necessary Ape Atoll travel equipment make the trip easier.
- Protect from Melee and gather monkeys into a compact stack before throwing. Position the target near the centre so the splash reaches nearby monkeys.
- Keep throwing on the rapid cycle, then briefly stop to re-form the stack when targets spread out. Hitting one monkey with an expensive throw defeats the purpose.
- Pick up useful Prayer-potion drops and maintain boosts. Include the time spent stacking and gathering supplies in throws per hour.
- Buy or catch a small test batch first. Record throws, XP and time before investing in a long session.
Chinchompas are consumed on every throw and Ava’s devices do not recover them. Grey, red and black have different accuracy, damage and prices. Choose the actual colour in the planner; the XP reference and ammunition must agree.
Compare chinchompa colours using the same gear and target stack. Solo training needs you to gather the monkeys yourself; helpers can keep them stacked while you throw.
Chinchompas start at 45 Ranged, red chins at 55 and black chins at 65. The route can continue to 99, but only makes sense with multiple targets stacked together and enough Prayer supplies to stay safe.
Chinning rates assume repeated hits on several targets. Simply unlocking chinchompas at 45 does not supply the quest access, Prayer, accuracy or target stacking behind a high-level benchmark.
Low-attention Ranged training
The Gemstone Crab is a strong long-session target with very little switching. Ordinary crabs remain useful when they are easier to reach.
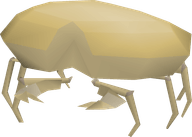
Levels 10–30: Sand crabs
An easy members’ training stop with low incoming damage. Choose enough spawns to keep fighting, rather than automatically taking the busiest three-crab spot.
Getting there
Travel to Hosidius and head to its southern beach. From a Kourend arrival point, run south through Hosidius; a Xeric’s talisman or house teleport can shorten later trips.
Bring and unlock
A fast ranged weapon, suitable ammunition and your best usable ranged equipment. Use rapid for bows and darts; set auto-retaliate on. Bring food until you know the incoming damage.
- Stand where two or three crabs can wake up and attack. Let the low-defence targets sustain the session.
- When aggression ends after roughly ten minutes, run far enough away to reset it, then return to the same tile.
- If you repeatedly wait for respawns, use more spawns or a higher-HP target. If you take too much damage, start with fewer crabs.
An empty two-crab spot can be better than competing over three spawns. Include aggression resets and potion upkeep in your measured pace.
Use sand crabs from about 10 to 30. Move to ammonite crabs after Bone Voyage, or the Gemstone Crab once you can reach it, when longer-lived targets suit your damage. You can stay here longer if those areas are not unlocked.
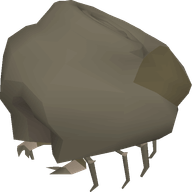
Levels 30–99: Ammonite crabs
More Hitpoints per crab means fewer retargets and less wasted overkill as your weapon improves.
Getting there
Complete Bone Voyage and travel to Fossil Island. Use the barge from the Digsite for the first trip, then your unlocked digsite-pendant and mushroom transport routes.
Bring and unlock
A fast ranged weapon, suitable ammunition and your best usable ranged equipment. Use rapid for bows and darts; set auto-retaliate on. Bring food until you know the incoming damage.
- Stand within reach of the desired spawns and let auto-retaliate keep combat going.
- Reset aggression when the crabs stop waking up. Keep enough food for the return to the spot.
- Collect fossils when doing so fits the session; they can help with Museum displays or other account goals.
Bone Voyage unlocks the location, but it does not guarantee an empty training spot. Use sand crabs or the Gemstone Crab if the available spawns are worse.
From around 30, ammonite crabs can carry a relaxed Ranged route to 99. Improve your equipment as you level. Chinchompas from 45 offer much faster multi-target training once you have the area and Prayer setup.
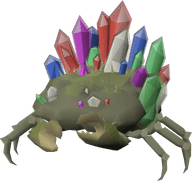
Levels 30–99: Gemstone Crab
An effectively continuous target which removes respawn waits and overkill. It awards 87.5% of ordinary combat XP per damage, so compare the actual session rate instead of assuming every crab is identical.
Getting there
After Children of the Sun, travel to the Tlati Rainforest in Varlamore and find the Gemstone Crab. Use the nearby route through the caves when it moves.
Bring and unlock
A fast ranged weapon, suitable ammunition and your best usable ranged equipment. Use rapid for bows and darts; set auto-retaliate on. Bring food until you know the incoming damage.
- Choose the intended attack style and start attacking from a safe tile.
- When the crab burrows after about ten minutes, follow the nearby cave route to its next location and attack again.
- Keep boosts active if you included them in your time budget. Mining the exposed crab for gems is optional and interrupts combat training.
There is no useful “crabs to kill” count here. The planner shows damage needed, with the reduced XP multiplier applied.
From around 30, use the Gemstone Crab for a continuous low-attention target all the way to 99. It awards reduced XP per damage, so compare your actual pace with other crabs after gear upgrades.
Other worthwhile methods
Train Ranged while working towards combat rewards when finishing the skill alone is not the only goal.
Ranged that advances another skill
Cannoning multi-combat Slayer tasks can add substantial damage while you attack with melee or Magic. Set the cannon where it fires often and where targets can reach useful lines; poor placement wastes both time and ammunition.
Ranged weapons are useful for safespotted tasks and encounters with a ranged weakness. An imbued Slayer helmet gives its ranged benefit only on the assigned task. The unimbued helmet does not provide the ranged damage boost.
On an Iron, compare the time spent making cannonballs or collecting weapon charges with the time they save. Catching your own chinchompas also trains Hunter, so it can be a worthwhile combined goal even though the Ranged session is not free.
Spend money where it changes the method
A magic shortbow with suitable arrows remains useful at low-defence training targets. An imbued version improves it further. A toxic blowpipe offers fast damage, but its dart and scale costs make the sustained supply budget important.
Void ranged equipment gives a set damage benefit, but requires wearing the relevant full set. It can be good against low-defence stacks; other damage gear can compete or outperform it depending on the setup. Do not delay all Ranged training for Void unless the set also fits your other goals.
A venator bow can bounce attacks between suitable nearby targets and offers a lower-attention alternative to repeated chinchompa throws. It needs the right target spacing, arrows and charges. Use a measured full-session rate for that setup rather than copying a single-target bow rate.
One-off XP rewards
Shadow of the Storm offers a 10,000-XP combat choice that can go into Ranged, although you still need to finish its quest chain and fight. Death to the Dorgeshuun awards Ranged XP while opening useful Dorgeshuun equipment. Check all rewards before questing on an account that restricts Defence or Hitpoints.
Completed rewards are already in your current XP. Only include the ones you still intend to claim.
Time and cost for your goal
The quickest routes spend ammunition much faster than a quiet crab session. Choose your attack style before comparing time and cost: Longrange shares damage XP with Defence, so reaching the same Ranged goal takes more ammunition. Cannon damage does not award Hitpoints XP.
Plan your Ranged route or compare method quantities and costs.
What Ava’s devices actually save
The attractor returns 60% of eligible ammunition directly, the accumulator 72%, and the assembler 80%. Some of the remainder may land on the ground rather than break, depending on the device. Picking it up changes the final consumption rate.
Metallic body armour can interfere with ammunition recovery. Wear appropriate ranged armour and check the device before a long session. Chinchompas, cannonballs and other ineligible ammunition are not saved by an accumulator.
For bows, darts, blowpipes and charged weapons, use the extra hourly supply budget from a test session. That budget should include ammunition actually lost, scales or charges and potions. For chinchompas and cannonballs, the planner has dedicated quantity and price inputs.
Remember which methods train Hitpoints
Ordinary ranged weapon damage gives Hitpoints XP alongside Ranged. Cannon damage does not. A character trained heavily with a cannon can therefore have much less Hitpoints than a character with the same Ranged level trained on crabs.
Longrange gives 2 Ranged XP and 2 Defence XP per damage, alongside 1.33 Hitpoints XP. It also loses rapid’s one-tick speed bonus: shortbows go from three ticks to four, while darts go from two to three. Enter the resulting damage rate when using custom inputs; there is no single slowdown percentage that fits every weapon.
For chinchompas, medium fuse attacks every three ticks and long fuse every four. With the same damage per throw and equally efficient play, long fuse gives each of Ranged and Defence 37.5% of the rapid Ranged XP/hour, and 75% of its Hitpoints XP/hour. The published preset applies this change automatically. Restricted builds should check their attack style before starting.
Choose your next goal
Open the Ranged Training Planner for your method switches and time budget, or compare one method’s quantities in the Ranged Calculator.