
Hunter
OSRS Hunter 1–99 Guide
Start with the Natural History Quiz, then learn the traps and tracking methods that carry you into Rumours, chinchompas or Herbiboar. Build a block list you understand, keep the catches your account needs and fit birdhouse runs around the rest.
Updated , including the 19 August Hunter update
Continuous training or runs between other activities?
Hunter mixes tracking, traps and assignments. Active methods need regular movement and resets; birdhouses give short visits spread through the day. Rumours add variety and rewards, but your travel and blocked tasks affect how smoothly they go.
Starting at level 1? See the quest route ↓Skip to level 9 at Varrock Museum
Optional quest route · order, requirements and next training method
Do the Natural history quiz before buying bird snares. It skips the slowest opening levels, costs nothing and also gives 1,000 Slayer XP.
Level 1 → 9 +1,000 Hunter XP
Natural history quiz
Before you start: No skill requirements, supplies or combat.
Go downstairs in Varrock Museum and speak to Orlando Smith. Answer the questions at each creature display, then return to him to claim both XP rewards.
Continue from level 9
At 9, buy a noose wand and track Feldip weasels in the Feldip Hunter area south of Yanille. Search a burrow, inspect nearby plants to follow the trail, then use the wand at its end. Continue to 15, then move to ruby harvests and copper longtails.
Go to the training instructions →Birdhouses are already within your Hunter level after the quiz, but they need Bone Voyage for Fossil Island access and 5 Crafting for the first house. Add those runs once you have the unlock; the quiz alone does not grant island access.
Levels count the XP listed above from a fresh start. Making your own supplies, quest fights or optional lamps can put you further ahead.
More quest XP as you progress
At 27, Eagles’ Peak unlocks box traps. At First Light comes later, at 46, and is needed for Master Rumours at 91. Neither can be used as a level-1 shortcut.
| Quest | Hunter XP | Hunter requirement | Why it matters |
|---|---|---|---|
| Eagles' Peak | 2,500 | 27 Hunter | Unlocks box traps for chinchompas and jerboas |
| At First Light | 4,500 | 46 Hunter | Required before Master Rumours at level 91 |
Fastest Hunter training
Active tracking and traps beat waiting between birdhouse runs when you want the levels sooner. Wilderness chinchompas set the high-end pace; rumours are a strong safe alternative.

Levels 1–73: The first traps and tracking methods
A no-quest start; later catches need their own equipment and accessStart with tracking or bird snares, then add butterflies and stronger traps as they unlock. These early methods use different tools: the level steps below explain what to bring and what to click at each spot.
Levels 1–9: Natural History Quiz
Speak to Orlando Smith in Varrock Museum’s basement and answer the creature-display questions for 1,000 Hunter XP. If you want to catch creatures instead, use a bird snare on crimson swifts in the Feldip Hunter area until 9.
Levels 9–15: Feldip weasels
Take a noose wand to the Feldip Hunter area and inspect a weasel burrow. Track and catch weasels until 15, then move to butterflies and birds near Piscatoris.
Tracking: a visible trail can end at several nearby objects. Search the object at the end, then follow the new tracks. For the final hiding spot, use the noose-wand attack option rather than repeatedly searching it. Keep the wand equipped.
Levels 15–21: Ruby harvests and copper longtails
Bring a bird snare, butterfly net and jars to the woods south of the Piscatoris Fishing Colony, near fairy ring AKQ. Reset the bird snare, then catch a nearby ruby harvest while waiting. Release jarred butterflies to reuse the jars. If you spend the whole time chasing a distant butterfly, your snare may collapse before you return.
Levels 21–39: Red crabs
Progress Pandemonium to reach its crab traps. With 10 Construction, bring a hammer, saw and one plank, one bucket and two nails per trap to build them once. Bait with fish offcuts, then empty successful traps and let the character re-bait. Two traps are usable at 21. A pestle and mortar turns catches into stackable paste, keeping the inventory clear. If you have not unlocked the traps, keep catching birds and butterflies to 29, then use swamp lizards to 39.
Levels 39–43: Embertailed jerboas
After unlocking box traps through Eagles’ Peak, use fairy ring AJP by Locus Oasis in Varlamore. The area west of the Hunter Guild is an alternative if you are already nearby. Set traps close to the spawns, check catches and reset failures. The three-trap pace needs 40 Hunter, so boost with a Hunter potion at 39 or use two traps until the level arrives.
Levels 43–49: Spotted kebbits
Bring 500 coins to Matthias in the Piscatoris falconry area and leave your weapon, shield and gloves unequipped. Click a spotted kebbit, then retrieve the falcon from a successful catch before choosing another. Stay in a compact patch of spawns. At 49, change to razor-backed kebbit tracking for faster XP, or stay with falconry if you prefer it.
Levels 49–73: Razor-backed kebbits
Use a noose wand in the Piscatoris Hunter area, near fairy ring AKQ. Inspect a burrow, search plants at the end of the tracks, then attack the final bush with the wand. A ring of pursuit can reveal the whole trail when it activates. Keep moving between nearby starting burrows and bank or drop the spikes as the inventory fills. At 73, switch to black chinchompas for the active Wilderness route; red chins from 63 are the safer alternative.
Do not spend longer travelling to a short bracket than you will spend training it. Completing Eagles’ Peak is particularly useful because box traps remain relevant for chinchompas later.
Take the museum quiz for levels 1–9, then follow the catches below through to 73. The short early brackets use different equipment; bring the next trap before travelling. Salamanders are a simpler alternative if the island unlocks do not suit your account.

Levels 29–73: Salamanders
29 / 47 / 59 / 67 HunterA repeatable net-trap route: swamp lizards, orange salamanders, red salamanders, then black salamanders. The last option is in the Wilderness.
- Getting there
- Swamp lizards are south-east of Canifis; fairy ring ALQ is a convenient approach. Orange salamanders are north-east of the desert’s Uzer carpet stop. Red salamanders are near the Ourania altar, north of Castle Wars. Black salamanders are at the Wilderness Hunter area.
- Bring and unlock
- One small fishing net and rope for each trap, plus spares. Bring waterskins for orange salamanders. Check your items and escape route before using the Wilderness option.
 1 small net + 1 rope
Use a young tree to set the trap. Bring one pair per trap you can place.
- Check, release, reset
Release catches for inventory room. Retrieve nets and ropes from fallen traps before they disappear.
- Set a net on each young tree and remain close enough to reset them promptly.
- Check successful traps and reset failed ones. Release the catches for the fastest XP loop.
- Use the extra trap slots as your Hunter level rises. The Wilderness permits one extra trap, but player interruptions belong in the time estimate.
A trap that has fallen to the ground needs attention before it disappears. Keep spare nets and ropes so a missed reset does not end the trip.
Use swamp lizards from 29 to 47, orange salamanders from 47 to 59, red from 59 to 67, then black to 73. At 73, black chinchompas are the next active option; stay with red salamanders or move to red chins if you want to avoid the Wilderness.

Levels 63–99: Red and black chinchompas
63 red; 73 blackStackable Ranged ammunition and a satisfying trap loop. Red chins avoid Wilderness risk; black chins offer more value and potential XP with frequent banking.
- Getting there
- Red chinchompas live in Feldip Hills. The private area after the hard Western Provinces diary or the Prifddinas area after Song of the Elves improves the setup. Black chinchompas are in the Wilderness Hunter area; the hard Wilderness diary shortcut speeds access.
- Bring and unlock
- Complete enough of Eagles’ Peak to use box traps. Bring the available number of traps plus spares. For black chins, bring inexpensive escape gear and a teleport that works at your planned escape level.
 Lay out your box traps
Use the number your level allows, in a compact pattern near the spawns.
- Reset catches and failures
Caught chinchompas stack. Reset triggered traps and pick up collapsed boxes before placing them again.
- Place traps close to the chinchompa spawn rather than spreading them across the whole area.
- Check catches and reset failures promptly. At 80 you gain another trap; the Wilderness also allows an extra trap.
- Bank black chinchompas regularly. They stack, so a long uninterrupted trip also means a larger loss if you die.
- Once normal resets are consistent, learn tick resets with a herb-tar action. It shortens the trap cycle, but demands close attention to failed traps and spawns.
Get a tidy trap field before learning faster resets
Use three traps from 40, four from 60 and five from 80, with one extra permitted in the Wilderness. Keep each within a short move of your standing tile and close to the creatures’ spawns. A spread-out field spends more time on running and leaves fewer traps available.
For tick resets, bring a clean low-tier herb, swamp tar and a pestle and mortar. The herb-tar action starts a short action cycle that you interrupt with the trap action. Learn one reset at a time, then add failed traps and walking. Do not practise for the first time with a large stack of black chins at risk. Red chins let you learn the input without banking around player attacks.
On an Iron, bank red chins for multi-target Ranged training. They are consumed as ammunition, so only catch the amount you intend to use. Black chins improve damage but add Wilderness losses and interruptions to the supply grind.
At 80 Hunter, black chinchompas are about 135k typical and 167k in a strong normal setup. The separate tick setup is about 167k to 197k XP/hr. The highest black-chin benchmarks can use a second account shooting the spawn. A normal solo setup should use its own measured rate, including escapes and banking.
Catch red chinchompas from 63, then choose black chins from 73 if you accept Wilderness risk. Either can carry the rest of the grind to 99. At 80 Hunter you gain another trap, so update your trap layout.
Expert and Master Rumours can be close enough in practice to justify choosing them over Wilderness risk. The block list, travel and whistle setup matter more than selecting a rumour tier by level alone.
Low-attention Hunter training
Birdhouses are short recurring visits; maniacal monkeys are the clearer choice for an ongoing session with gaps between catches.

Levels 60–99: Maniacal monkeys
60 Hunter and Monkey Madness IILonger waits between actions for a quieter Hunter session. This is a useful alternative to continuously resetting several traps.
- Getting there
- Take the gnome glider to Ape Atoll and investigate the jungle grass just south of the landing. In the dungeon, go north, cross the monkeybars with a Kruk monkey greegree and continue north into the laboratory.
- Bring and unlock
- A Kruk monkey greegree and bananas. Baskets of bananas make an easy supply inventory. Bones to bananas tablets can turn the bones in the room into more bait.
- With the Kruk greegree active, mount a stunted demonic gorilla.
- Click a large boulder with a banana in your inventory to set the deadfall trap.
- Check the trap after a catch or failure, then set it again. Open another basket as bait runs low.
Keep a teleport equipped for the return journey. Regular Bones to Bananas spellcasting requires dropping the greegree transformation, so tablets are simpler for this loop.
From 60 after Monkey Madness II, use boulder traps for a quieter route to 99. Herbiboar at 80 and stymphikes at 82 are alternatives when you want useful output or a change of scenery.

Levels 5–99: Birdhouse runs
5 Hunter, 5 Crafting and Bone VoyageShort timed visits for nests and Hunter XP alongside another grind. They are useful even when you do not use them as your main training method.
- Getting there
- Use a digsite pendant to the House on the Hill, then the mushroom network to Verdant Valley and Mushroom Meadow. On the first trip, use the Bone Voyage boat and unlock the mushroom destinations as you walk around Fossil Island.
- Bring and unlock
- A hammer, chisel, four logs of the right tier and seed bait. Set up four clockworks once; they are returned when a house is emptied. Cheap hop seeds use ten per house, so take at least 40 for a run.

 4 logs + 4 clockworks
Use the log tier for your Hunter and Crafting levels. Bring a hammer and chisel.
 Place and bait all four
Each needs 10 barley seeds or other suitable hop seeds: 40 for the run.
 Return after about 50 minutes
Empty for XP and possible nests. The clockwork comes back; only logs and seeds need replacing.
- Place and bait both houses in Verdant Valley and both in Mushroom Meadow.
- After at least 50 minutes, return to empty them. You receive Hunter XP, nests and each reusable clockwork.
- Make replacement houses from the logs and returned clockworks, place them, then add bait again.
- Leave for another activity. The schedule uses your runs per day because the growth timer cannot be compressed into continuous training.
Four logs, a hammer, a chisel and 40 suitable hop seeds. First setup also needs four clockworks.
Two houses in Verdant Valley, then two in Mushroom Meadow. Empty, rebuild and bait each house.
The timer runs while you do something else. Returning sooner does not make a full run ready.
Click a house to empty it and recover the clockwork. Use that clockwork with the next log to make a replacement, place it, then add the seeds. Check the bait confirmation before walking away: an unbaited house will not catch birds. Keep nests with rings or seeds until you have emptied them, then crush the empty nests for Saradomin brews.
Crafting level controls which houses you can make. Match the house to both skills, and bring enough inventory space for nests instead of arriving with a full herb-run inventory.
Start from 5 Hunter after Bone Voyage and keep adding runs alongside other training to 99. Upgrade the log when both your Hunter and Crafting levels allow the next house; the four-house route stays the same.
Other worthwhile methods
Hunter outputs can support Farming, Herblore and combat, so there are good reasons to train outside the absolute fastest route.
Drift nets for two skills. At 44 Hunter and 47 Fishing after Bone Voyage, drift net fishing trains both skills. The combined XP makes it appealing when neither skill is finished, but does not turn that combined number into Hunter XP alone. Drift net instructions.

Levels 46–99: Hunters’ Rumours
46 novice; 57 adept; 72 expert; 91 masterVaried Hunter tasks, sacks and guild upgrades. The route gets much better with a prepared task list and convenient teleports.
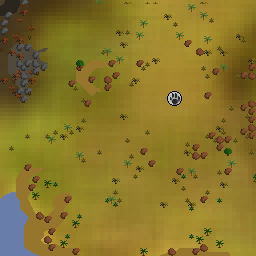
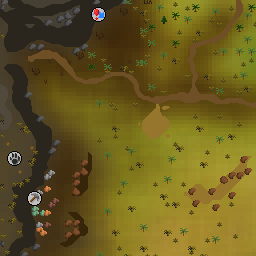
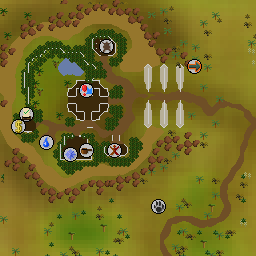
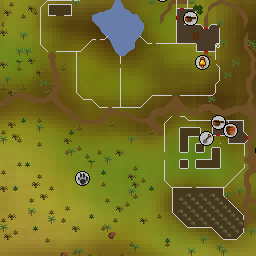
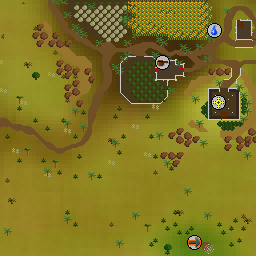
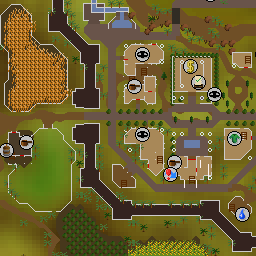
Enter the guild in southwest Varlamore and go downstairs to the hunters. Use their rumour option to ask for an assignment.
- Getting there
- Go to the Hunter Guild in the Avium Savannah after Children of the Sun. Use the Varlamore quetzal route once available; a charged guild whistle becomes your convenient return after you earn it.
- Bring and unlock
- Speak to a hunter in the guild basement. Bring equipment and travel for the assigned creature. Master Rumours require At First Light. Keep a bank tab with trap equipment and task teleports.
- Take a rumour, hunt the assigned creature until you find its rare creature part, then return to the hunter who assigned it.
- Turn in the part for XP and a sack. Ask the same hunter for another task when training that tier.
- To block an unwanted creature, obtain that assignment from a different hunter and leave it unfinished. Other hunters then exclude that creature from their task pools.
- Build the blocks around one hunter you plan to use. Keep the blocking assignments unfinished; handing one in removes that block.
How to build a Rumour block list
Each hunter remembers their assignment, even while you work for somebody else. An unfinished assignment removes that creature from the other hunters’ pools. You build a block by doing that hunter’s tasks until they assign the creature you want to leave there.
Complete assignments with your blocking hunter until the right creature appears.
Switch hunters. Do not hand in the rare part for your blocking task.
The blocked creature is now excluded from their assignments.
Keep the stored assignments. The one-off reroll offered when switching hunters is a temporary task, so it does not establish a lasting block by itself. Complete it and get a normal assignment before relying on it. Do not ask Gilman for a “brand new” Rumour after setting up: that resets the stored list.
57–71: a simple Adept setup
Train with Cervus. Park the two slow deadfall creatures with the other hunters below. This keeps the first block list small enough to build while learning the guild.
| Hunter | Assignment to keep | What to do |
|---|---|---|
| Gilman | Pyrefox | Leave this assignment unfinished. |
| Ornus | Sabre-toothed kebbit | Leave this assignment unfinished. |
| Cervus | Your active hunter | Complete his tasks and keep taking his next assignment. |
If Gilman gives you sabre-toothed kebbit first, keep it and get pyrefox from Ornus instead. The two blocks have the same effect.
72–90: an Expert setup with a choice of herbs
Use Aco for a route without Herbiboar. Use Teco if you want Herbiboar assignments from 80 for herbs. The other Expert holds the sunlight antelope block. Here is one valid arrangement:
| Hunter | Assignment to keep | What to do |
|---|---|---|
| Gilman | Grey chinchompa | Leave unfinished. |
| Cervus | Sabre-toothed kebbit | Leave unfinished. |
| Ornus | Sabre-toothed kyatt | Leave unfinished. |
| Unused Expert | Sunlight antelope | Teco blocks it if training with Aco; Aco blocks it if training with Teco. |
| Chosen Expert | Your active hunter | Keep accepting tasks from this hunter. |
Hunters have different pools. This arrangement works as a whole; swapping creatures between arbitrary hunters may not. Set up Gilman first because his large pool makes a particular last remaining block slow to obtain.
91+: Master Rumours that keep Herbiboar
After At First Light, train with Wolf. This layout leaves dashing kebbits, moonlight antelope and Herbiboar, combining short tasks with herbs and useful antelope supplies.
| Hunter | Assignment to keep | What to do |
|---|---|---|
| Gilman | Moonlight moth | Leave unfinished. |
| Cervus | Red chinchompa | Leave unfinished unless you want to gather chins. |
| Ornus | Red salamander | An optional final block; this is a relatively quick task. |
| Aco | Tecu salamander | Leave unfinished to keep Herbiboar available. |
| Teco | Sunlight antelope | Leave unfinished. |
| Wolf | Your active hunter | Complete and replace his Master assignments. |
Prefer Tecu salamanders to Herbiboar? Have Aco hold sunlight antelope and Teco hold Herbiboar instead. You can also leave red chins unblocked when you need Ranged supplies, accepting longer assignments.
Whistles shorten the return to the guild. Keep quetzal feed for charges, plus a bank tab with box traps, nets and ropes, teasing stick, logs and a knife, and a butterfly net and jars as your task pool requires. Restock for the next assignment when you bank the sack.
Start by learning the task locations before spending a long time engineering a perfect block list. Adept can work well from 57 with blocks; Expert at 72 is the more convenient general entry point.
Novice rumours open at 46, adept at 57, expert at 72 and master at 91. Higher tiers become worthwhile when your teleports and block list are ready. Stay with a comfortable tier rather than taking long journeys just because another guild hunter unlocked.
Levels 60–99: Wyrmscraig goats
60 Hunter, 62 Sailing and Sheep HerderActive Hunter with horns for Herblore and fur for golem Crafting. The cattleprod is free; spells offer a different luring rhythm.
- Getting there
- Sail to Wyrmscraig and go to the goat area near Geoff. Unlock the island’s travel options as you explore; the activity is outside the golem-crafting quest requirement.
- Bring and unlock
- Take a cattleprod and spikes from the supplies beside Geoff. Bring a fur pouch for furs, or a reagent pouch and pestle and mortar for horns. Telekinetic Grab or Dark Lure can replace the cattleprod if you bring their runes.
- Line the goat pit with a spike.
- Stand on the far side of a goat and prod it towards the pit. For spells, stand across the pit from the goat and lure it towards you.
- Fill the pit, then collect the catches before setting it again. Several goats can be moving towards it at once.
- Keep the horns and fur you need. Processing or banking supplies will reduce the pace compared with a pure XP loop.
Try the free cattleprod first. Telekinetic Grab costs runes and requires you to position across the pit; it is an option to learn, not an automatic improvement for every player.
From 60 Hunter with 62 Sailing and Sheep Herder, catch goats for their horns and fur. Continue while you want those supplies; this is an alternative route rather than a required step before chinchompas.
Levels 80–99: Herbiboar
80 Hunter and 31 HerbloreA steady tracking loop that banks herbs and fossils. There is a lot of running, but fewer rapid trap resets.
- Getting there
- After Bone Voyage, use the Fossil Island mushroom network to Mushroom Meadow. A digsite pendant bound to the House on the Hill makes the return quick. On the first visit, arrive by boat and walk through the mushroom forest.
- Bring and unlock
- Run-energy restoration and space for herbs. Bring magic secateurs if owned: they add one herb per harvest. Ordinary secateurs are not required. An herb sack helps with longer trips.
- Inspect a starting rock, mushroom or log to find tracks.
- Follow the trail and inspect the objects at each dead end until it leads to a burrow.
- Kick the burrow, then click the stunned herbiboar again to harvest the herbs.
- Restart from a nearby starting object. Bank before your inventory is too full to harvest the next catch.
Take the herbs after finding the burrow
Kicking the burrow awards the Hunter XP, but you still need to click the stunned herbiboar to harvest it. Ordinary secateurs are not required. Magic secateurs add one herb per harvest when equipped or in your inventory, so bring them if you own them.
Keep enough free slots for the next harvest, or open an herb sack for supported herbs. Your Herblore level affects the herb mixture, so Herbiboar is a useful general supply method rather than a reliable way to target one rare herb. Keep fossils for the museum displays if those XP rewards are still useful.
A helper overlay makes the possible search objects easier to see, but the basic rule stays the same: follow the current tracks. Herbs depend on Herblore level and rolls, so a catch count is not an exact herb shopping list.
From 80 Hunter and 31 Herblore, track herbiboars to 99 or until you have the herbs and fossils you need. Bring magic secateurs for an extra herb; changing to another method at 82 or 91 is optional.
Levels 82–99: Stymphikes
82 Hunter and The Blood Moon RisesA quieter late-game method with a roughly 45-second cycle. Most inputs come together at the start and end of the wait.
- Getting there
- Use Drakan’s medallion to reach the Castle Drakan portal and enter Vampyrium. Travel to the Apsul Hunting Ground for the stymphike trees. Saving the Aranei scout on the path from the Ruined Village unlocks fast travel; bring a pickaxe to clear the hunting-ground shortcut from its south side.
- Bring and unlock
- Hunter’s spears or makeshift spears, letvek bait and inventory space for loot. Each baiting can use more than one letvek, so bring a stack.
- Bait one tree, then immediately click the nearby bush to hide. Merely standing beside the bush does not begin the waiting action.
- Wait for the bird. Your character peeks from the bush during the wait and gains smaller Hunter XP drops.
- Spear the arriving stymphike, or allow the character’s next peek to attack automatically. Re-bait and hide again after the XP drop.
- Collect feathers and other loot when needed. Baiting several trees does not multiply the spawn rate.
The 1,350 XP catch is only part of a successful cycle; peeking also gives XP. The theoretical ceiling assumes no missed spears, so use a normal-session pace for your first long plan.
From 82 after The Blood Moon Rises, use stymphikes for a quieter late-game route to 99. The preparation and collection clicks surround a longer wait, so this suits sessions where constant trap resetting is unappealing.
Hunter Rumours
Start a Rumour tier when the block list and travel are ready
- Novice
- 46 Hunter
- Adept
- 57 Hunter
- Expert
- 72 Hunter
- Master
- 91 Hunter
Adept Rumours are worth trying at 57 if you enjoy tasks and have useful teleports. Without blocks, a slow creature or long journey can dominate the session. Expert at 72 gives you a stronger general route, but you can start learning the guild earlier.
Use the worked block lists to leave unwanted assignments with other hunters. You do not have to finish a perfect list before trying Rumours. Learn a few tasks first, then build the blocks for the hunter you want to stay with. At 80, Teco can keep Herbiboar in your Expert pool if the herbs matter to you.
Use Adept when you want sacks and varied resource tasks and are willing to prepare the list. A practical planning band is about 70k to 100k XP per hour with useful blocks and teleports. Continue the active route when that setup is missing, then start Expert at 72.
At 72, Expert Rumours plan around 115k typical and 160k in the faster setup. At 91, Master Rumours plan around 145k typical and 195k in a strong setup. Player reports span a wider range because assignments, whistles, teleports and execution all compound.
Birdhouse runs
Treat birdhouses as timed nest runs after the 2026 update
On 19 August 2026, Jagex reduced birdhouse XP by 60% for regular through teak houses, 55% for maple, 50% for mahogany, 40% for yew and 15% for magic. Redwood XP did not change. The number of nest rolls fell from ten to five, but each roll became three times as likely to succeed. Jagex estimated about 50% more nests per run.
A complete run replaces four houses on Fossil Island. The route usually takes about 90 seconds, then the houses need 50 minutes to mature. Dividing the run XP by 90 seconds gives an active-time equivalent, not a sustainable hourly rate.
| House | Hunter | Crafting | XP per house | XP per four-house run |
|---|---|---|---|---|
| Regular | 5 | 5 | 112 | 448 |
| Oak | 14 | 15 | 168 | 672 |
| Willow | 24 | 25 | 224 | 896 |
| Teak | 34 | 35 | 280 | 1,120 |
| Maple | 44 | 45 | 369 | 1,476 |
| Mahogany | 49 | 50 | 480 | 1,920 |
| Yew | 59 | 60 | 612 | 2,448 |
| Magic | 74 | 75 | 969 | 3,876 |
| Redwood | 89 | 90 | 1,200 | 4,800 |
Use them when: you want bird nests, already visit Fossil Island, or can attach a run to another timer. Use Rumours or active methods for sustained Hunter XP. The birdhouse schedule shows active time and real elapsed time separately.
Main and Iron accounts
Value the outputs differently
Main account
Choose the loop you can sustain, then compare current method economics in the Calculator. Chinchompa, herb, horn, fur and sack values move, so a fixed profit claim will age faster than the route.
Fast active methods make sense when XP is the priority. Rumours are useful when you also want outfit or whistle progress. Lower-input methods are often a better real session than a higher ceiling you stop after twenty minutes.
Iron account
Bird nests support Saradomin brews, red and black chinchompas become stackable Ranged ammunition, Herbiboar adds herbs and fossils, and Rumours provide sacks plus permanent unlock progress. Those outputs can justify a slower XP route.
Attach birdhouses to a herb run or another break from active training. The nest stack is useful even if the XP no longer justifies logging in solely to empty low-tier houses.
The Training Planner keeps Main and Iron priorities separate. Use the Hunter Calculator for catch quantities and current prices.
Choose the catches that remove a supply bottleneck
- Brews later: birdhouses bank nests long before 81 Herblore. Empty the seed or ring first and save the nest for crushing. Pair it with stored toadflax in the Herblore supply plan.
- Ranged training: red chins supply multi-target training without Wilderness trips. Use black chins when the extra damage is worth the risk and interruptions for your account.
- More herbs: Herbiboar adds a mixed herb supply while you train Hunter. Bring magic secateurs for the extra herb. You can retain it in Expert or Master Rumours rather than choosing between all Rumours and all Herbiboar.
- Prayer and account supplies: Rumour sacks give supplies including blessed bone shards. Save the shards for wine offerings at the Teomat; the Mining guide explains the shared offering step. Antelope tasks also supply meat and antlers, so a slightly slower task can still be worth keeping.
There is no need to force every Hunter resource into one route. A useful pattern is birdhouses between sessions, a Rumour tier you enjoy for active training, and a dedicated chin or Herbiboar block when that particular supply runs low.
When to switch
Switch when an unlock improves your real session
| Level | Decision | Switch when |
|---|---|---|
| Level 57 | Adept Rumours | Use them for varied tasks and sacks when your blocks and travel are ready. Continue active methods when they are not. |
| Level 60 | Goats or maniacal monkeys | Choose goats for active XP and horns or fur. Choose monkeys after Monkey Madness II for longer, quieter cycles. |
| Level 63 | Red chinchompas | Switch when you value stackable Ranged ammunition or the trap loop. Normal play starts well below practiced reset rates. |
| Level 72 | Expert Rumours | A useful point to make Rumours your main route, with a stronger task pool and better sacks. |
| Level 73 | Black chinchompas | Use only when Wilderness risk, interruptions and high input are acceptable. Keep normal and tick setups separate. |
| Level 80 | Herbiboar | Switch for herbs, fossils and a steadier tracking loop when Bone Voyage and 31 Herblore are complete. |
| Level 82 | Stymphikes | Switch for a low-input 45-second cycle after Blood Moon Rises. The 143,175 rate is a no-miss theoretical ceiling. |
| Level 91 | Master Rumours | Switch when At First Light, blocks, whistles and task teleports are ready. Otherwise Expert Rumours remain valid. |
Carry the basic Hunter kit for the method, not every item in the skill. Box traps, ropes and nets, a noose wand, weight-reducing gear, task teleports and a one-click Wilderness teleport each belong to different routes. Prepare the next setup before reaching the switch level.
At Stymphikes, the Wiki table reaches 143k per hour by level 99 and lists a 143,175 theoretical maximum from 83 kills with no missed spears. Keep those labels separate. At black chinchompas, the highest tick rate also assumes a shooting alt, so it is not a solo normal-play promise.
Clicks and client settings
Make trap resets and birdhouse runs simpler
These RuneLite plugins are included with the client. Find them in the plugin configuration sidebar, turn them on and open their settings.
Menu Entry Swapper: reset a trap or empty a birdhouse
Enable RuneLite’s Menu Entry Swapper. Its Reset option puts Reset ahead of Check on box traps; its Birdhouse option puts Empty ahead of Interact on birdhouses. Test the action at your chosen trap and at a ready birdhouse so you know what the next click will do. After emptying a birdhouse, rebuild it and add the seeds for the next run.
Time Tracking: check the next birdhouse run
Enable Time Tracking and open its Bird Houses tab after checking your houses. Use the timer to fit the next run around your other training. If you played on another client, visit the houses again so this RuneLite client can see their current state.
Mobile has its own menu editor: long-press the trap or birdhouse, tap edit and move the wanted action to the top. Test the new action on one trap before using it for the rest.