
 Smithing training
OSRS Smithing 1–99 Guide
Choose what you want from your bars. Blast Furnace gold offers fast XP; Giants’ Foundry stretches your metal further; dart tips and cannonballs leave useful supplies at the end. Follow the method instructions by level, with optional quests to shorten the opening.
Updated
Spend metal on the training you want
Smithing a bar, making equipment from it and using it at Giants’ Foundry are different methods. Anvils and Blast Furnace offer fast levels; Foundry gets more XP from the metal you bring. Start with a small supply stack so you can learn the loop before committing your cash or ores.
Starting at level 1? See the quest route ↓Quest from 1 to 33 Smithing
Optional quest route · order, requirements and next training method
The Knight’s Sword skips almost all bronze smithing. Members can follow it with Sleeping Giants to unlock Giants’ Foundry and reach 33 without training between the two quests.
Level 1 → 29 +12,725 Smithing XP
The Knight’s Sword
Before you start: 10 Mining, a pickaxe, two iron bars and a redberry pie. Bring food for the blurite cave.
Speak to the squire in the White Knights’ Castle courtyard in Falador. Help Thurgo replace the sword, then return it to the squire. You need to survive the ice cave, but do not have to kill its monsters.
Level 29 → 33 +6,000 Smithing XP
Sleeping Giants
Before you start: Members and 15 Smithing, already reached above.
Find Kovac beneath the Giants’ Plateau east of Al Kharid. Repair the foundry and make the quest sword to learn the heating, cooling and shaping routine.
Continue from level 33
At 33, make iron platebodies for fast early anvil training, or stay at Giants’ Foundry to get more XP from your metal. Free-to-play players finish The Knight’s Sword at 29: smith iron warhammers to 33 before switching to platebodies.
Go to the training instructions →Elemental Workshop I and II can add another 5,000 and 7,500 Smithing XP. The first needs 20 Mining, Smithing and Crafting; the second needs 30 Smithing, 20 Magic and the first quest. Do them when those other skills are ready rather than delaying your first Foundry session.
Levels count the XP listed above from a fresh start. Making your own supplies, quest fights or optional lamps can put you further ahead.
Fastest Smithing training
Quest XP gets you close to Blast Furnace gold. With Goldsmith gauntlets and a clean banking loop, gold is the main fast route from 40 to 99.
1 to 40: quest rewards and a short anvil finish. The Knight’s Sword gives 12,725 XP, taking a fresh account to 29. Other early Smithing quests can finish most of the opening. If you are a few levels short, smith the bars you have rather than buying a huge bronze stack. Smithing quest rewards.

Levels 1–99: Anvil smithing
Make items that use several bars at once when you want XP quickly. A platebody consumes five bars in one action; five daggers use the same bars but take five actions.
Getting there
The anvils just south of Varrock’s west bank are available immediately. After Song of the Elves, the Trahaearn district bank and anvils in Prifddinas shorten the trip.
Bring and unlock
A hammer and bars. Smiths’ Uniform improves production speed; it does not multiply the XP from a bar.
- Use a bar on the anvil, choose the item and make the inventory.
- Bank the finished items, withdraw bars and repeat. Keep the hammer in a locked inventory slot.
- Compare the net cost of the finished armour before buying a whole goal. Low-level items can have thin GE trading volume.
Levels 1–5: Bronze daggers
12.5 XP per bronze dagger. The materials list shows the bars required, not just the number of finished items.

Levels 5–9: Bronze scimitars
25 XP per bronze scimitar. The materials list shows the bars required, not just the number of finished items.

Levels 9–18: Bronze warhammers
37.5 XP per bronze warhammer. The materials list shows the bars required, not just the number of finished items.

Levels 18–24: Bronze platebodies
62.5 XP per bronze platebodie. The materials list shows the bars required, not just the number of finished items.

Levels 24–33: Iron warhammers
75 XP per iron warhammer. The materials list shows the bars required, not just the number of finished items.

Levels 33–48: Iron platebodies
125 XP per iron platebodie. The materials list shows the bars required, not just the number of finished items.

Levels 48–68: Steel platebodies
187.5 XP per steel platebodie. The materials list shows the bars required, not just the number of finished items.

Levels 68–88: Mithril platebodies
250 XP per mithril platebodie. The materials list shows the bars required, not just the number of finished items.

Levels 88–99: Adamant platebodies
312.5 XP per adamant platebodie. The materials list shows the bars required, not just the number of finished items.

Level 99: Rune platebodies
375 XP per rune platebodie. The materials list shows the bars required, not just the number of finished items.
Using bars in Giants’ Foundry directly usually gives more total XP than first smithing them into armour to melt there. Only melt equipment you already have or deliberately bought for its metal value.
Compare XP rates for these methods
Early rates follow the Wiki’s Varrock anvil route. Later platebody rates use 833 items/hr with close banking; choose a lower planning pace for slower trips.
Use the recipes below to turn each bar tier into XP, moving to items that consume several bars per action. At 40, gold with Goldsmith gauntlets is a faster alternative. Staying at anvils works to 99 when you prefer the simpler loop or already own the bars.

Levels 40–99: Gold at the Blast Furnace
The fast regular Smithing route from 40. Most of the learning is the short bank–belt–dispenser loop and equipping the correct gloves for the XP drop.
Getting there
Start The Giant Dwarf by speaking to the Dwarven Boatman in the cave east of Rellekka. After your first arrival, use the Blast Furnace minigame teleport or the GE minecart to Keldagrim.
Bring and unlock
Use an official Blast Furnace world and put coins in the coffer. Bring gold ore, ice gloves, stamina potions and Goldsmith gauntlets after Family Crest. Below 60, pay the foreman 2,500 coins per ten minutes.

 Goldsmiths for the XP drop
Wear these when the ore is smelted for 56.2 XP per gold bar, instead of the ordinary 22.5.

 Ice gloves for collecting hot bars
Use ice gloves at the dispenser, then put Goldsmith gauntlets back on before the next smelting XP drop.
- Deposit gold ore on the conveyor belt while wearing Goldsmith gauntlets. Keep them equipped when the ore’s XP is awarded.
- Equip ice gloves to take bars from the dispenser, bank the bars and withdraw more ore. Re-equip Goldsmith gauntlets for the next load.
- If bars have built up in the dispenser, part of the XP may arrive on collection. Re-equip Goldsmith gauntlets immediately after confirming collection so that XP also gets the bonus.
- Keep run energy topped up and put the two gloves and ore where the swaps are easy. Practise clean trips before trying to bank and start moving on the same tick.
Levels 40–99: Gold bars
A comparison for accounts without Family Crest. The same ore gives much less XP, so consider unlocking the gauntlets before buying a large grind.
Levels 40–99: Gold bars with Goldsmith gauntlets
Use this version when Goldsmith gauntlets are equipped for every XP drop.
Goldsmith gauntlets change gold from 22.5 to 56.2 XP per ore. Missing the swap costs much more than a slow bank click. A staff, hammer or coal bag is not needed for gold.
380k XP/hr with Goldsmith gauntlets is an efficient reference, not a learning rate. Without them the source gives 164k. Bring coins for the furnace and, below 60 Smithing, the foreman. Stamina potions add to the cost.
From 40, smelt gold at Blast Furnace for fast XP to 99. Complete Family Crest for Goldsmith gauntlets before a long grind: they more than double gold’s XP per bar. The ordinary-glove row is a comparison, not a later step.
Low-attention Smithing training
Smith one-bar items or cannonballs when you want an inventory to last. You give up the speed of gold bars for longer gaps between banking.

Levels 35–99: Steel cannonballs
Long inventories and useful Slayer ammunition, with much slower Smithing XP than gold or Foundry.
Getting there
The Edgeville furnace is a convenient bank route. Any accessible normal furnace works, but a longer bank trip lowers the rate.
Bring and unlock
Complete Dwarf Cannon. Bring an ammo mould and steel bars, or the double ammo mould from Foundry rewards.
- Use steel bars on the furnace and choose cannonballs. One bar produces four, even when the double mould processes two bars at once.
- Bank the cannonballs, refill bars and repeat. A normal mould’s inventory takes about 160 seconds; the double mould roughly halves that.
The ancient furnace in Grimstone Dungeon is a faster alternative with 87 Sailing access. It also needs a workable banking route; do not apply its production speed to an ordinary Edgeville session.
About 2,400 cannonballs/hr normally, 4,800 with the double mould. That is 600 or 1,200 steel bars/hr, not the same number of XP actions as cannonballs.
Make cannonballs from 35 to 99 when long inventories or Slayer ammunition matter more than fast Smithing XP. Unlocking a double ammo mould shortens each inventory and raises output; it also means returning to the bank more often.

Levels 4–99: Dart tips
One bar makes ten tips, leaving longer gaps between banks than armour. The XP is slower, but the output is useful ammunition material and may cover the bar cost.
Getting there
The anvils just south of Varrock’s west bank are available immediately. After Song of the Elves, the Trahaearn district bank and anvils in Prifddinas shorten the trip.
Bring and unlock
Complete The Tourist Trap to smith dart tips. Bring a hammer and bars. Smiths’ Uniform speeds up each inventory.
- Use a bar on an anvil and make dart tips. Let the inventory finish before banking.
- Keep the tips if you will attach feathers later, or value them as tips when selling. The Fletching XP belongs to that later step.
Levels 4–19: Bronze dart tips
Ten bronze dart tips per bar, with 12.5 Smithing XP.

Levels 19–34: Iron dart tips
Ten iron dart tips per bar, with 25 Smithing XP.

Levels 34–54: Steel dart tips
Ten steel dart tips per bar, with 37.5 Smithing XP.

Levels 54–74: Mithril dart tips
Ten mithril dart tips per bar, with 50 Smithing XP.

Levels 74–89: Adamant dart tips
Ten adamant dart tips per bar, with 62.5 Smithing XP.

Levels 89–99: Rune dart tips
Ten rune dart tips per bar, with 75 Smithing XP.
The ten tips are output quantity, not ten Smithing actions. Each bar gives one bar’s Smithing XP.
Compare XP rates for these methods
1,060 bars/hr without Smiths’ Uniform or 1,300 with the full set. A normal inventory takes about 81 seconds to smith.
Dart tips start with bronze at 4 and progress through the metal tiers below. Each bar still makes ten tips, so switching metal changes the XP and cost without changing the routine. Stay on a profitable tier if the next one costs too much.
Other worthwhile methods
Giants’ Foundry stretches the metal supply. Other Blast Furnace bars can make GP while training at a slower XP rate than gold.
Blast Furnace for profit. Coal savings make steel and higher bars worth comparing. Bring a coal bag when available, keep the coffer funded and include both coal and fees in the margin. The dedicated money guide compares bars with current prices. Blast Furnace profit guide.
Levels 15–99: Giants’ Foundry
Make a sword for Kovac by pouring an alloy, choosing moulds and working the metal at three different machines. You control its temperature as you go. A finished commission gives Smithing XP, coins and reputation for better moulds and other rewards.
Getting there
Complete Sleeping Giants at the foundry east of Al Kharid. The Giants’ Plateau cave entrance is reached from the plateau east of the city; a ring of dueling to the PvP Arena gives a short approach.
Bring and unlock
28 bars’ worth of two compatible metals. Ice gloves let you take the hot preform directly; without them use a bucket of water. Smiths’ Uniform gives extra machine progress, and the gloves can be combined with ice gloves.
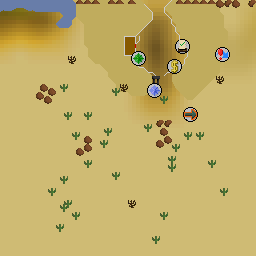
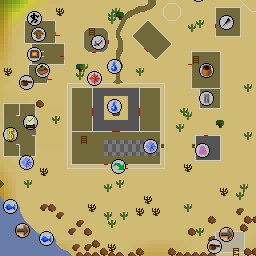
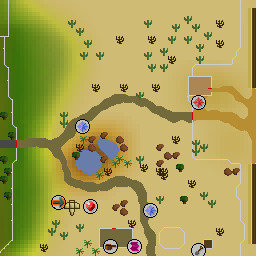
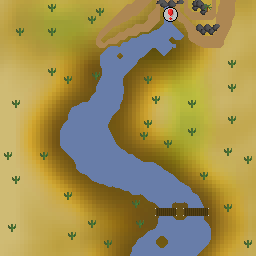
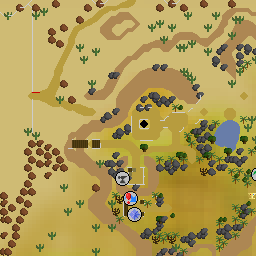
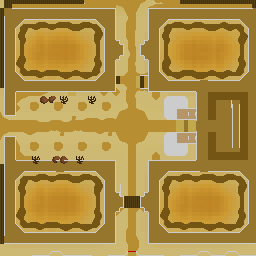

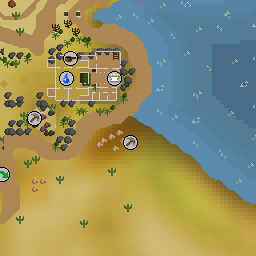
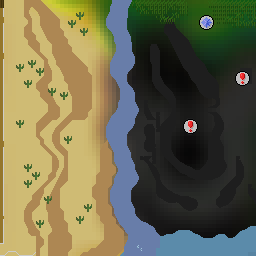
The entrance is east of Al Kharid, near the Giants’ Plateau. Speak to Kovac and complete Sleeping Giants to learn the workshop.
- Ask Kovac for a commission. In the mould interface, choose the best tip, blade and forte for the two requested qualities.
- Fill the crucible with your alloy, pour it and take the preform. Each ordinary bar counts as one; a smithable item contributes one fewer bar than it took to make.
- Follow the HUD: the trip hammer works hot, the grindstone at medium heat and the polishing wheel cool. Heat in lava or cool at the waterfall before working outside the correct band.
- When the HUD flashes gold, click the active machine once for the sweet spot. Watch for the progress entering a new section immediately afterwards so you do not continue with the wrong tool.
- Hand the finished sword to Kovac for XP, coins and reputation. Spend reputation on moulds that improve your commissions, then prepare another alloy.
Levels 15–30: Bronze and iron swords
14 bronze bar + 14 iron bar. Metal score 20.
Levels 30–50: Iron and steel swords
14 iron bar + 14 steel bar. Metal score 40.
Levels 50–70: Steel and mithril swords
19 steel bar + 9 mithril bar. Metal score 59.
Levels 70–99: Mithril and adamant swords
18 mithril bar + 10 adamantite bar. Metal score 89.
Levels 85–99: Adamant and rune swords
19 adamantite bar + 9 runite bar. Metal score 118.
Buy useful mould upgrades for the commissions you receive, then work towards the uniform. Do not assume a published table using every optimal mould is the rate of a fresh level-15 account.
Compare XP rates for these methods
The alloy and moulds set the starting quality. Working at the wrong temperature damages the sword and reduces the final reward. Compare full commissions, including heating, cooling and choosing the next moulds, when timing your training.
Start with bronze and iron from 15, then consider iron/steel at 30, steel/mithril at 50 and mithril/adamant at 70. You can keep the last alloy to 99. Adamant/runite unlocks at 85, but its price and extra work do not automatically make it a better training choice.
Choose an alloy by price and attention
At 70, 18 mithril and 10 adamantite bars gives a metal score of 89. Staying below the next difficulty band removes a refinement section, so a theoretically higher-quality 14/14 sword is not automatically a better hourly route.
At 85, 19 adamantite and nine runite bars is a faster, more expensive option. The default value route stays with mithril/adamantite; use the high-alloy instructions when finishing Foundry rewards quickly matters more than saving bars.
A platebody counts as four bars when melted; legs count as two. Compare the item price per bar-equivalent with buying bars directly. Avoid one-bar items and ornamental armour, which are not useful crucible supplies.
Spend an Iron’s bars deliberately
Use stored ores and the Blast Furnace’s reduced coal requirement to create Foundry alloys. Check coal, run-energy supplies and the furnace coffer before starting a large smelting session. Shop purchases and world hopping take time beyond the smelting loop.
Bars used directly in Foundry usually beat smithing them into armour first and then recycling that armour. The extra anvil XP does not make up for losing one bar per melted item. Equipment already dropped by monsters is a different decision: compare its alch value with the Foundry value.
Cannonballs and useful dart tips support Slayer and Ranged training. Making a supply stack during time when you would not do attentive Smithing can make sense even though it is a poor route to the fastest 99.
Time and cost for your goal
Blast Furnace gold buys speed; Foundry uses fewer metal supplies; cannonballs exchange time for a potentially useful output. The calculator compares the ingredients and products, while the planner builds the level switches.
Plan your Smithing route or compare method quantities and costs.
Read the full cost of a gold session
Official Blast Furnace worlds charge 72,000 coins per hour. Below 60 Smithing, the normal foreman charge adds 2,500 coins per ten minutes. The planner prorates those costs across training time; for a short trip, carry enough to make the actual ten-minute payment.
Stamina potions, initial travel and any paid runners are additional. Put your stamina spending in the hourly supplies field. The efficient source setup uses 40 doses per hour, but your Agility, weight and ring of endurance can change consumption.
The gold-bar sale value reduces the cost; it does not refund the ore in full. Test the buy/sell spread before starting and use your own sustainable pace after you have learned the glove swaps.
Clicks and client settings
Make the furnace loop easier to read
These RuneLite plugins are included with the client. Find them in the plugin configuration sidebar, turn them on and open their settings.
Blast Furnace: keep the next lap ready
Enable Blast Furnace. Turn on Show conveyor belt clickbox and Show bar dispenser clickbox to make the two repeated clicks easier to place. Show coffer time remaining helps you top up before the workers stop. Check its stored-bar display when a batch seems stuck, then check the furnace’s ore and coal quantities before depositing more.
Choose your next goal
Training for profit? Read the Blast Furnace money-making guide for the setup and a comparison using GE prices.
Open the Smithing Training Planner for your method switches and time budget, or compare one method’s quantities in the Smithing Calculator.